Haven't installed OpenClaw yet? Click here for one-line install commands
curl -fsSL https://openclaw.ai/install.sh | bashiwr -useb https://openclaw.ai/install.ps1 | iexcurl -fsSL https://openclaw.ai/install.cmd -o install.cmd && install.cmd && del install.cmd- OpenClaw is the fastest-growing open-source project in GitHub history in early 2026; at its core, it is an AI autonomous agent installed on your computer that can remotely control your entire machine via WhatsApp, Telegram, and other messaging apps
- Deployment is extremely simplified -- a single command completes installation, followed by a few CLI commands for initial setup (cloud hosts require manual configuration as the interactive wizard is not supported), supporting macOS, Linux, and Windows
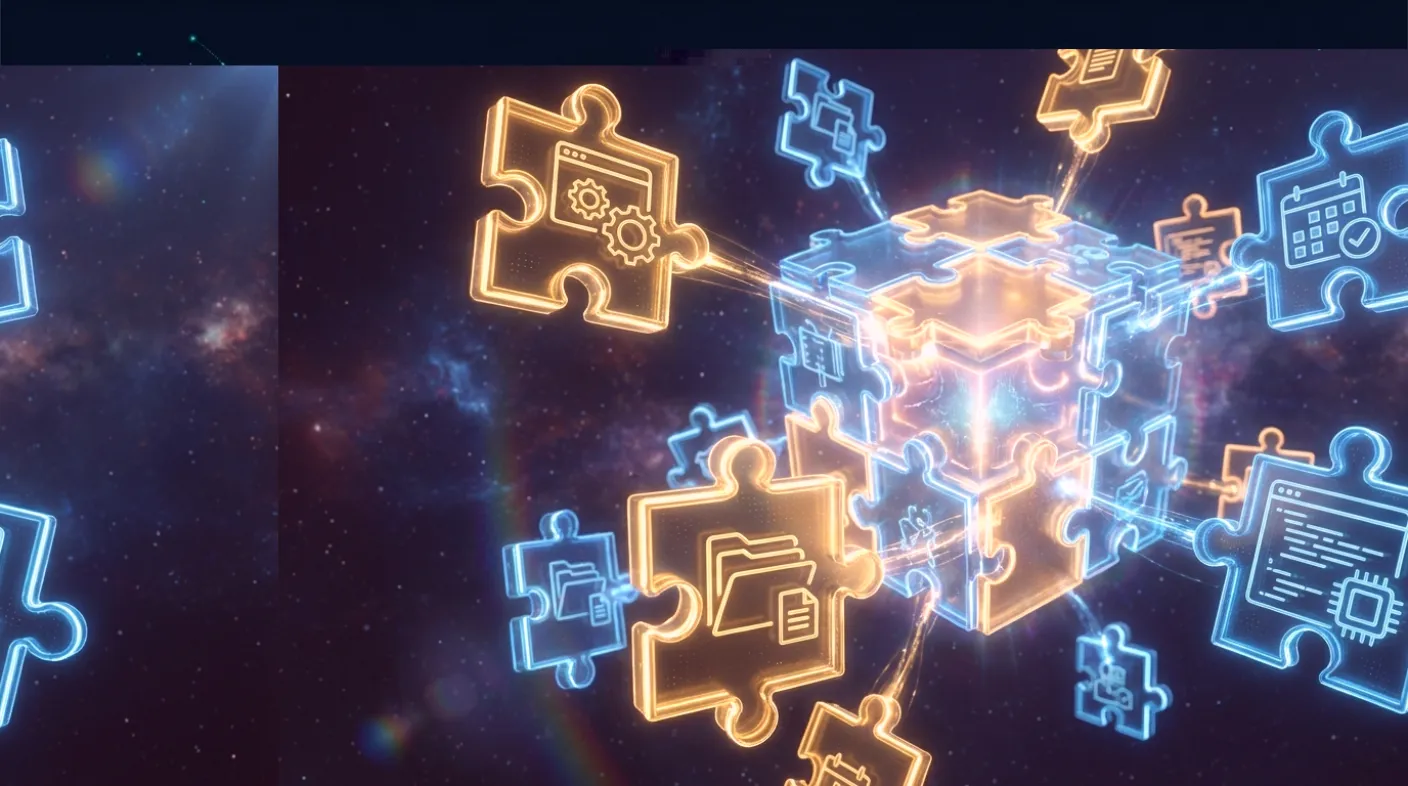
- Its four-layer architecture (Gateway -> Nodes -> Channels -> Skills) transforms AI from a mere chat tool into a versatile assistant capable of browser automation, scheduled tasks, and software development
- This article walks through the complete deployment process with hands-on testing, covering model setup, communication channel integration, browser automation, scheduled briefings, Claude Code software development, and advanced Hooks zero-polling + Agent Teams multi-agent collaboration
1. Why You Should Pay Attention to AI Autonomous Agents
In early 2026, the AI industry is undergoing a quiet but profound paradigm shift: from the "human asks, AI answers" conversational model to the "human sets a goal, AI autonomously plans and executes" agentic model.
Over the past three years, our typical AI interaction looked like this -- open ChatGPT or Claude, type a question, wait for a response, then decide the next step ourselves. AI was a powerful advisor, but execution still depended on humans.
But AI agents fundamentally change this logic. A true AI agent doesn't just answer your questions -- it understands your intent, breaks it into subtasks, calls tools to execute step by step, self-corrects along the way, and ultimately delivers results. You no longer need to guide the AI step by step; instead, you tell an experienced assistant "get this done for me" and go do other things.
OpenClaw (formerly ClawdBot / MoltBot) is the most representative open-source product in this paradigm shift. It surpassed 100,000 stars on GitHub within two days[1], was widely covered by mainstream media including Scientific American and CNBC[2][3], and became the most watched AI project of early 2026 -- not because its technology was cutting-edge, but because it gave ordinary people their first real taste of what "AI taking over your computer" feels like.
In our previous article "OpenClaw First Look", we analyzed OpenClaw's core value and risks from a team perspective. This article focuses on hands-on practice -- a step-by-step guide taking you from zero through OpenClaw's installation, configuration, and six real-world scenario tutorials.
2. Architecture Overview: Understanding OpenClaw's Four-Layer Design
Before getting hands-on, spend two minutes understanding OpenClaw's architecture -- this will help you grasp the big picture more quickly during the subsequent setup process.
OpenClaw uses a four-layer architecture design[3]:
- Gateway (Core Hub): The nerve center of the entire system, handling task scheduling, memory management, and LLM dispatch, running on
ws://127.0.0.1:18789. All commands ultimately converge at the Gateway for processing - Nodes (Hardware Nodes): Handle interaction with your computer hardware -- file system operations, shell command execution, process management. Supports macOS, Linux, Windows WSL2, and even Raspberry Pi
- Channels (Communication Channels): Connect WhatsApp, Telegram, Discord, Slack, Signal, and over 10 other messaging platforms, letting you issue commands to the AI through your daily chat tools
- Skills (Skill Modules): Extensible capability plugins -- browser automation, calendar integration, code execution, blog monitoring, and more. Through the Skills marketplace, you can continuously expand the AI's capability boundaries
Additionally, there is a cross-cutting Memory Layer that persistently stores your conversation context and preferences in Markdown file format, making OpenClaw understand you better over time.
With this four-layer understanding, you'll know exactly which "layer" you're configuring at every subsequent step.
3. Prerequisites & Preparation
Before starting installation, confirm your environment meets these requirements:
- Operating System: macOS, Linux, or Windows. Cloud hosts and Raspberry Pi are also supported
- Node.js: Version >= 22 (verify with
node --version) - Memory: Minimum 2GB; 4GB+ recommended if using browser automation
- LLM API Key: You need at least one large language model API key -- supports Anthropic (Claude), OpenAI (GPT), and others; local models are also supported
If you haven't installed Node.js 22 yet, you can quickly install it as follows:
# macOS (using Homebrew)
brew install node@22
# or using nvm
nvm install 22
nvm use 22
Step 1Installation & Onboarding ~ 5 minutes
OpenClaw's installation process is extremely simplified. Open a terminal and run the following command[4]:
# macOS / Linux
curl -fsSL https://openclaw.ai/install.sh | bash
# Windows (PowerShell)
iwr -useb https://openclaw.ai/install.ps1 | iex
You can also install globally via npm:
npm i -g openclawAfter installation, run the initial setup. Note: openclaw onboard's interactive wizard requires a TTY terminal and will fail in cloud hosts (SSH) or headless environments, so we recommend the following manual setup steps:
# Initialize configuration file
openclaw setup
# Set Gateway to local mode (required for cloud hosts)
openclaw config set gateway.mode local
# Install Daemon service (systemd)
openclaw daemon install
# Start Daemon
openclaw daemon start
These four steps complete: generate default config -> set Gateway mode -> register systemd service -> start background Daemon. If you're on a local machine (macOS / desktop Linux) with an interactive terminal, you can alternatively use openclaw onboard to complete everything in one step.
After setup, verify the Gateway status:
# Check Gateway running status
openclaw gateway status
You should see a message indicating the Gateway is running on http://127.0.0.1:18789/. You can also launch the Control UI browser interface:
# Open the web-based control interface
openclaw dashboard
The Control UI provides an intuitive web interface for chatting with OpenClaw, viewing message history, and checking system status directly in your browser. To manually start the Gateway in the foreground (useful for debugging):
# Start Gateway in foreground (for testing and debugging)
openclaw gateway --port 18789openclaw gateway status should show the Gateway is running on http://127.0.0.1:18789/. Opening openclaw dashboard should display the web-based control interface.
Step 2Model Setup: Choosing an Engine for the AI Brain ~ 3 minutes
If you completed model setup during Onboarding, you can skip this step. If you need to adjust later, OpenClaw provides flexible model management.
OpenClaw does not include a built-in large language model -- it needs to connect to an external LLM as its inference core. Models use the provider/model format, e.g., anthropic/claude-sonnet-4-5.
# Re-enter the setup wizard
openclaw configure
# Or configure a specific section only
openclaw configure --section web
You can also read and modify settings directly via CLI:
Method A: Using an API Key (for all users)
If using Anthropic Claude (recommended, as OpenClaw is natively built on the Claude ecosystem), you need to obtain an API Key from the Anthropic Console:
# Set API Key via CLI (supports environment variable substitution)
# In ~/.openclaw/openclaw.json you can write: "apiKey": "${ANTHROPIC_API_KEY}"
openclaw models auth paste-token --provider anthropic
Method B: Using Claude Code subscription's setup-token
If you already have a Claude Code (Max / Pro plan) subscription, you can authenticate directly using a setup-token without needing a separate API Key:
# First run claude setup-token in another terminal to get the token
openclaw models auth paste-token --provider anthropic
# Paste the setup-token to complete authentication
Setting the default model:
# View the current default model
openclaw config get agents.defaults.model.primary
# Set default model (simplified command)
openclaw models set "anthropic/claude-opus-4-6"
# Set fallback model
openclaw config set agents.defaults.model.fallbacks '["openai/gpt-4o"]'
If settings issues arise, use the built-in diagnostic tool:
# Verify settings are correct
openclaw doctor
# Auto-fix common issues
openclaw doctor --fixopenclaw doctor should show all checks passing. Once model settings are correct, send a test message in the Control UI to confirm the AI responds normally.
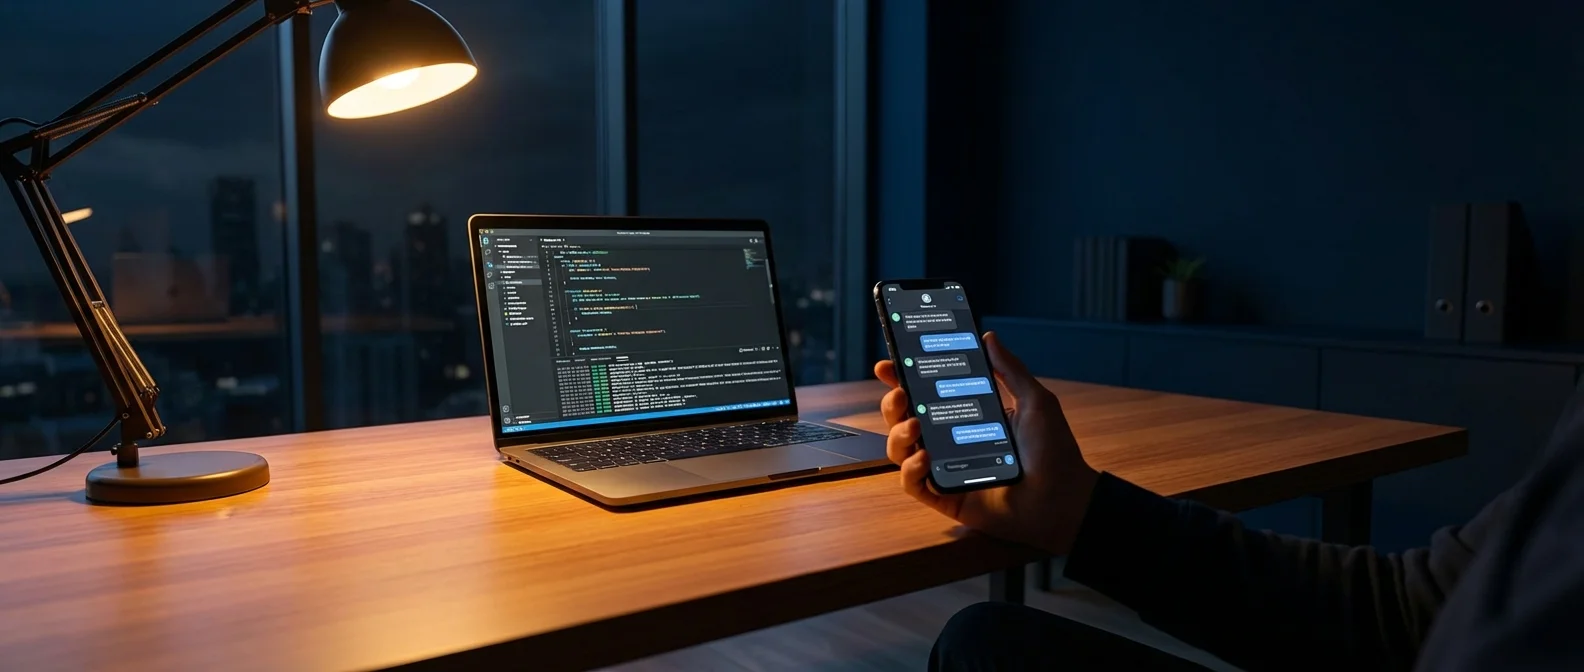
Step 3Communication Channel Integration: Control Your Computer from Your Phone ~ 5 minutes
This is one of OpenClaw's most impressive features -- issuing commands to your computer through WhatsApp, Telegram, Discord, and other messaging apps. The Onboarding Wizard's fourth step already covers channel setup, but you can also add channels manually afterward.
OpenClaw uses a Pairing mechanism to manage channel access permissions. But before pairing, you must first complete the channel's prerequisite setup. Using Telegram as an example:
# 1. Set Telegram Bot Token (obtained from @BotFather)
openclaw config set channels.telegram.accounts.default.botToken "YOUR_BOT_TOKEN"
# 2. Enable Telegram plugin (disabled by default)
openclaw config set plugins.entries.telegram.enabled true
# 3. Restart Gateway for settings to take effect
openclaw daemon restart
After completing prerequisite setup, proceed with pairing:
# View pending pairing devices
openclaw pairing list telegram
# Approve pairing
openclaw pairing approve telegram <CODE>
WhatsApp channels are linked by scanning a QR code. All channel settings are stored in the channels section of ~/.openclaw/openclaw.json. Supported access control policies include:
- pairing (default): New devices must be approved before communicating with OpenClaw
- allowlist: Only whitelisted users are allowed
- open: Open to everyone (not recommended for public scenarios)
After linking is complete, you can:
- Send text commands from your phone to OpenClaw, which executes them on your computer
- Receive execution result reports from OpenClaw
- Remotely control your computer while away (provided the computer stays on and OpenClaw is running)
Currently supported channels include: WhatsApp, Telegram, Discord, Slack, Signal, iMessage, Google Chat, Mattermost, and MS Teams. You can also send a quick test message via CLI:
# Send a test message
openclaw message send --target +886912345678 --message "Hello from OpenClaw"
After setting up channels, send a message to OpenClaw from your phone, such as "Hello, what time is it?" If everything works correctly, OpenClaw will reply within seconds.
openclaw pairing list <channel> should show paired devices.
Step 4Install Skills & Enable Hooks ~ 3 minutes
Skills are OpenClaw's capability extension mechanism. Skills can be installed in two ways: automatic detection of system CLI tools, and installation via the clawhub community package manager.
Method A: Install System CLI Tools (Auto-Detection)
# Browser automation (requires Chromium)
sudo apt install -y chromium-browser
# GitHub integration (requires gh CLI + authentication)
sudo apt install -y gh
gh auth login --web
# Claude Code integration
npm i -g @anthropic-ai/claude-code
# Gemini CLI
npm i -g @google/gemini-cli
# YouTube subtitles / audio download
pip3 install yt-dlp
# Audio splitting + video processing
sudo apt install -y ffmpeg ripgrep
Method B: Install Community Skills via clawhub
clawhub is OpenClaw's community Skills package manager for searching and one-click installing various capability modules:
# Search available Skills
npx clawhub search gemini
# Install community Skill (installs to ~/.openclaw/workspace/skills/)
npx clawhub install sag          # ElevenLabs TTS
npx clawhub install nano-pdf     # PDF processing
npx clawhub install summarize    # Summarization tool
Method C: Set API Key Environment Variables
Some Skills require third-party API Keys. After setting them, they must be added to the systemd service environment (see Pitfall Record #11):
# OpenAI (image generation, speech-to-text)
export OPENAI_API_KEY="your_key"
# Gemini
export GEMINI_API_KEY="your_key"
# ElevenLabs (speech synthesis)
export ELEVENLABS_API_KEY="your_key"
# Notion integration
export NOTION_API_KEY="your_key"
# Remember to also add these to the systemd service and /home/coder/.profile# Verify Skills detection status
openclaw skills checkMethod D: Create Custom Skills (SKILL.md)
You can package frequently used workflows into custom Skills and place them in the ~/.openclaw/workspace/skills/ directory. Each Skill only needs a SKILL.md file, and OpenClaw will automatically detect and load it:
# Create custom Skill directory
mkdir -p ~/.openclaw/workspace/skills/my-skill
# SKILL.md format example (frontmatter + usage instructions):
cat > ~/.openclaw/workspace/skills/my-skill/SKILL.md << 'EOF'
---
name: my-skill
description: One-line description of this Skill's function
metadata: {"openclaw":{"emoji":"🔧","requires":{"bins":["curl"],"env":["MY_API_KEY"]}}}
---
# My Skill
Usage instructions, command examples, parameter descriptions...
EOF
# Verify detection
openclaw skills check
In our testing, we created two custom Skills:
- youtube-transcript -- Integrates
yt-dlpsubtitle download + OpenAI Whisper API audio transcription, automatically choosing the best method to obtain transcripts - gemini-image -- Generates images via the Gemini 3 Pro Image Preview API, supporting batch generation and custom prompts
Skills Practical Prompt Examples:
Below are real command examples sent to OpenClaw via Telegram -- each message automatically triggers the corresponding Skill:
| Skill | Telegram Prompt |
|---|---|
| youtube-transcript | Convert this video into an English transcript https://youtube.com/watch?v=xxx |
| gemini-image | Use Gemini to generate a cyberpunk-style Tokyo night scene with deep blue tones and gold neon lights |
| coding-agent | Use Claude Code to add OAuth Google login to ~/Projects/app |
| github | Check hirosichen/my-repo for any PRs that need review |
| notion | Organize today's meeting notes into a Notion page titled "2026-02-14 Weekly Meeting" |
| openai-image-gen | Use DALL-E to generate a minimalist product mockup with a white background |
| openai-whisper-api | Transcribe the recording at /tmp/meeting.mp3 to text |
| sag | Use ElevenLabs to convert "Welcome to Meta Intelligence" into speech |
| gemini | Use Gemini to analyze the data trends in this screenshot |
| weather | What's the current weather in Taipei? |
The Hooks (Webhooks) feature lets you automatically execute actions when specific events trigger, configurable in the automation section of ~/.openclaw/openclaw.json.
OpenClaw also has a unique capability: it can create its own Skills. When the AI determines a task requires specific functionality not covered by existing Skills, it can write new skill modules and load them itself. All custom skills are stored in the workspace's skills directory.
openclaw skills check should show an Eligible count greater than 12. At this point, basic deployment is complete and you can proceed to hands-on scenarios.
8. Scenario 1 -- Browser Automation
OpenClaw includes built-in browser automation (openclaw browser), which can remotely control a Chromium browser -- opening web pages, scraping information, filling forms, taking screenshots -- all fully automated.
If you're running on a cloud host (no graphical interface), you need to install a virtual display first:
# Cloud host (no GUI) requires virtual display
sudo apt install -y xvfb
Xvfb :99 -screen 0 1280x720x24 &
export DISPLAY=:99
Testing is simple -- send a command via WhatsApp or the terminal:
"Open GitHub, search for the OpenClaw project, and tell me the current star count and latest Release version"
OpenClaw will automatically launch Chromium, navigate to GitHub, enter search keywords, click into the project page, scrape the star count and release information, and return the results as formatted text.
The potential of this feature goes far beyond search -- it can be used for regular competitor webpage monitoring, automated form filling, periodic web data extraction, and more. Note that browser automation requires at least 4GB of memory, and on cloud hosts requires additional virtual display setup (headless Chromium).
9. Scenario 2 -- Scheduled Tasks: Daily AI Briefing
This was one of the most practical features in our testing. Through Cron Job configuration, OpenClaw can automatically execute tasks at fixed times daily and push results to your WhatsApp.
Combined with the BlogWatcher skill, you can set up a daily AI news briefing:
# First use BlogWatcher to add RSS sources to monitor
blogwatcher add "GitHub: Claude Code" \
  https://github.com/anthropics/claude-code/releases.atom
blogwatcher add "OpenAI Blog" \
  https://openai.com/blog/rss.xml
# Scan once manually to confirm RSS sources work
blogwatcher scan
blogwatcher articles
After confirming RSS sources work, set up the scheduled task:
# Push AI briefing to WhatsApp daily at 9 AM
openclaw cron add \
  --name "Daily AI Briefing" \
  --cron "0 9 * * *" \
  --tz "Asia/Taipei" \
  --session isolated \
  --message "Please compile the important AI news from the past 24 hours in English, including technology breakthroughs, product launches, and industry developments, presented as a bullet-point briefing" \
  --deliver \
  --channel whatsapp
Once configured, you'll receive an AI-compiled news briefing on WhatsApp every morning at 9 AM. To test immediately:
# Run immediately (don't wait for scheduled time)
openclaw cron run <CRON_JOB_ID> --force
Scheduled task applications are extremely broad: daily weather reminders, weekly report auto-compilation, competitor dynamics tracking, social media data summaries, and more -- all achievable with a single cron configuration.
10. Scenario 3 -- Invoking Claude Code for Auto-Development
This is the most exciting feature for technical users -- OpenClaw can invoke Claude Code to automatically write, test, and deploy code.
In our testing, we sent a command via WhatsApp:
"Please build a backend login page using Node.js + Express, with username and password fields, styled with Bootstrap, and password encrypted with bcrypt"
Here's what OpenClaw did:
- Created project structure: Automatically created directories and initialized
package.json - Installed dependencies: Automatically ran
npm install express bcrypt ejs - Wrote backend code: Generated Express routes, bcrypt encryption logic, and session management
- Wrote frontend pages: Generated login page templates using Bootstrap
- Started and tested: Automatically started the server and reported the accessible URL
The entire process took about 2-3 minutes. We opened the reported URL in a browser and saw a fully functional backend login page.
The difference between this "commanding AI with natural language to write code" experience and using Claude or ChatGPT directly is that OpenClaw doesn't just generate code snippets -- it completes the entire flow from project creation to deployment. It handles file system operations, package installation, environment configuration -- all the tedious steps developers usually do manually[5].
11. Advanced: Hooks Zero-Polling + Agent Teams Multi-Agent Collaboration
The conventional invocation method from the previous section has a pain point: OpenClaw polls Claude Code's status and output every few seconds. The longer the task runs, the more polling occurs, and the more tokens consumed. This is the most frequently mentioned issue in the community.
The solution is quite elegant -- leveraging Claude Code's Hooks callback mechanism, combined with the latest Agent Teams multi-agent collaboration feature, to achieve true zero-polling asynchronous development.
11.1 Core Principle: From Polling to Callbacks
The traditional approach:
OpenClaw assigns task -> polls Claude Code status every few seconds -> continuously consumes tokens -> task completes -> returns result
The Hooks zero-polling approach:
OpenClaw delegates task (one-time, background execution) -> Claude Code runs independently -> task completion triggers Stop Hook -> automatically writes result + wakes OpenClaw -> pushes notification to chat group
Throughout this process, OpenClaw only consumes tokens when dispatching the task and reading the result -- Claude Code's autonomous development process in between consumes zero OpenClaw tokens. Moreover, the main Agent is not blocked and can handle other tasks simultaneously.
11.2 Agent Teams: Claude Code's Multi-Agent Collaboration
Claude Code's recently added Agent Teams feature makes this workflow even more powerful. Agent Teams is essentially building a complete development team within Claude Code -- each Agent is an independent process, truly running in parallel, able to communicate with each other, share task lists, automatically claim work, and implement specialized role division (frontend, backend, testing, etc.).
Combined with Hooks callbacks, you can send a development command from your phone to OpenClaw, and Claude Code's Agent Teams will automatically split the work, collaborate across multiple agents to complete development, and then automatically push a detailed report to your chat group.
11.3 Hooks Configuration: Stop + SessionEnd Dual Guarantee
Among Claude Code's 14 Hooks, we select two:
- Stop Hook (Primary Callback): Triggers when Claude Code finishes generation, ensuring development is truly complete before executing the callback
- SessionEnd Hook (Fallback Callback): Triggers when the session ends, serving as a safety backup -- even if the Stop Hook fails, SessionEnd will still trigger the notification
Prerequisite: Claude Code CLI Authentication (Three-Layer Environment)
OpenClaw's coding-agent skill executes the Claude Code CLI as a non-root coder user (for security isolation). This means you need to set up authentication in three places: root shell, systemd service, and coder user.
# Get OAuth token on your local computer (valid for one year)
claude setup-token# Create coder user (OpenClaw will automatically su to this user)
useradd -m -s /bin/bash -U coder
# Allow passwordless su (required internally by OpenClaw)
passwd -d coder# Layer 1: root shell (for direct SSH usage)
echo 'export CLAUDE_CODE_OAUTH_TOKEN="your_token"' >> ~/.bashrc
# Layer 2: systemd service (inherited by OpenClaw Gateway's child processes)
# Edit ~/.config/systemd/user/openclaw-gateway.service
# Add to [Service] section:
# Environment=CLAUDE_CODE_OAUTH_TOKEN=your_token
systemctl --user daemon-reload && openclaw daemon restart
# Layer 3: coder user (actual execution environment for coding-agent)
echo 'export CLAUDE_CODE_OAUTH_TOKEN="your_token"' >> /home/coder/.profile
chown coder:coder /home/coder/.profile# Verify root environment
claude -p "hello"
# Verify coder environment
su - coder -s /bin/bash -c "claude -p 'hello'"Note: Hook scripts also need to be copied to the coder user's directory (/home/coder/.openclaw/hooks/), and paths need to be updated in /home/coder/.claude/settings.json. Since the coder user cannot access root's OpenClaw settings, Telegram notifications in Hooks should use curl to call the Bot API directly, rather than openclaw message send.
Configure Hooks in Claude Code's settings file ~/.claude/settings.json:
{
  "hooks": {
    "Stop": [
      {
        "hooks": [
          {
            "type": "command",
            "command": "/path/to/hooks/notify-agi.sh",
            "timeout": 10
          }
        ]
      }
    ],
    "SessionEnd": [
      {
        "hooks": [
          {
            "type": "command",
            "command": "/path/to/hooks/notify-agi.sh",
            "timeout": 10
          }
        ]
      }
    ]
  }
}
Note: Claude Code passes context information via stdin as JSON (including session_id, cwd, hook_event_name), and callback scripts need to read this data from stdin. Also, since Stop and SessionEnd may trigger in quick succession, scripts should implement deduplication (e.g., a lock file) to avoid duplicate notifications.
11.4 Callback Script's Dual-Channel Design
The callback script uses a dual-channel architecture, balancing reliability and immediacy:
- Data Channel (latest.json): Writes the complete task result (session ID, timestamp, working directory, full output, status) to a JSON file, with no length limits
- Signal Channel (Wake Event): Wakes the OpenClaw main session via an API call, providing real-time notification
The dual-channel design is necessary because Wake Events have a character limit (approximately 300 characters), while Claude Code output can exceed 2,000 characters. File storage handles unlimited content, while the Wake Event provides real-time notification. Even if the Gateway API call fails, latest.json is still written, and the Agent can read the result on its next heartbeat -- this is fault-tolerant design.
Waking OpenClaw is done via CLI system event injection (note: the Gateway does not provide a REST API; CLI must be used):
# Method 1: CLI direct system event injection (recommended)
openclaw system event \
  --text "Claude Code task complete, read latest.json" \
  --mode now \
  --token "$TOKEN"
# Method 2: Send Telegram message directly to a specified group
openclaw message send \
  --channel telegram \
  --target "$TELEGRAM_GROUP" \
  --message "Claude Code task complete, results written to latest.json"
11.5 Implementation: Setting Up a Telegram Notification Group
To have Hook completions automatically push notifications to Telegram, you need a separate notification group (separate from your daily conversation window to avoid context confusion). Here are the complete setup steps:
Step 1: Create a Group and Get the Group ID
- Create a new group in Telegram (e.g., "OpenClaw Notifications")
- Add your OpenClaw Bot to the group
- Send any message in the group
There's a gotcha when getting the Group ID: if the OpenClaw Gateway is running, it continuously consumes Telegram updates, causing the getUpdates API to return an empty array. The solution is to check the Gateway logs:
# Find the group ID from Gateway logs
tail -200 /tmp/openclaw/openclaw-*.log | grep -o '"chatId":-[0-9]*'
# Example output: "chatId":-5201877902
Step 2: Configure Group Access Permissions
The default groupPolicy: allowlist blocks all group messages. Change it to open (or add the group ID to the whitelist):
# Open group access (or configure allowlist as needed)
openclaw config set channels.telegram.groupPolicy open
openclaw config set channels.telegram.accounts.default.groupPolicy open
# Restart for settings to take effect
openclaw daemon restart
Step 3: Test Notification Sending
# Test with your group ID (replace with actual ID)
openclaw message send \
  --channel telegram \
  --target "-5201877902" \
  --message "OpenClaw notification test successful"
After confirming the group receives the message, write the Group ID into the callback script's TELEGRAM_GROUP variable. From then on, every time a Claude Code task completes, the Hook will automatically push a result summary to this notification group.
11.6 Complete Flow: From Phone Command to Receiving Development Report
Here is a complete test scenario. We entered via a messaging app:
"Use Claude Code's Agent Teams collaboration mode to build a physics engine-based HTML/CSS falling sand simulation game with a material system"
What happened next:
- OpenClaw delegated the task to Claude Code's Agent Teams (only this single call, negligible token consumption)
- The main Agent was not blocked -- we continued asking "What's the weather in Singapore today?" and "Tell me a joke" in the same chat window, and OpenClaw responded in real time
- Claude Code ran autonomously in the background for about 6 minutes, with multiple Agents collaborating in parallel
- Development completed, Stop Hook triggered automatically, results written to latest.json
- We received a push notification in another chat group -- containing task name, project path, completion time, Agent Teams activation status, 184 tests passed, delivered feature list, and project structure
The reason for pushing notifications to a separate group rather than the main Agent's chat window is to avoid completion notifications suddenly appearing while other tasks are being executed in the main window, causing context confusion.
The complete Hooks callback code is open-sourced at github.com/win4r/claude-code-hooks, including dispatch scripts, callback scripts, and Claude Code configuration examples.
12. Advanced: Supermemory Plugin -- Giving AI Perfect Long-Term Memory
OpenClaw's built-in Memory layer stores conversation context as Markdown files, but as usage time increases, this simple memory mechanism hits limitations: limited context windows, inability to unify memory across channels, and lack of semantic search capability. The Supermemory plugin is designed to solve these problems.
12.1 What Supermemory Solves
Imagine this scenario: last week you told OpenClaw via WhatsApp "I prefer developing in TypeScript," and today you switch to Telegram to ask it to write an API. Without Supermemory, OpenClaw in the Telegram session won't know your preference -- because it's a separate conversation context.
With Supermemory installed, OpenClaw gains unified semantic memory across channels and time. It will:
- Auto-Capture: After each conversation turn, automatically extract key information (your preferences, project background, decision records) and send it to Supermemory's cloud for deduplication and semantic indexing
- Auto-Recall: Before each AI response, automatically query semantically relevant historical memories and inject them into context -- not crudely inserting all conversation history, but precisely recalling the most relevant fragments
- User Profile: Automatically builds and continuously updates your personal preference profile -- preferred languages, tech stack, work habits, communication style
The result: OpenClaw truly becomes a "learns more about you over time" long-term assistant, rather than just a conversation tool that starts from scratch every time.
12.2 Installation & Configuration
Installation requires just one command:
openclaw plugins install @supermemory/openclaw-supermemoryAfter installation, restart OpenClaw. Then configure the API Key (requires Supermemory Pro or higher plan):
# Set environment variable
export SUPERMEMORY_OPENCLAW_API_KEY="sm_your_key_here"
Or write directly to ~/.openclaw/openclaw.json:
{
  "plugins": {
    "entries": {
      "openclaw-supermemory": {
        "enabled": true,
        "config": {
          "apiKey": "${SUPERMEMORY_OPENCLAW_API_KEY}"
        }
      }
    }
  }
}
12.3 Advanced Configuration Parameters
Supermemory provides fine-grained control options:
containerTag: Memory namespace (defaultopenclaw_{hostname}); multiple hosts can share the same memory storeautoRecall/autoCapture: Auto-recall and auto-capture toggles (both default totrue)maxRecallResults: Maximum number of memories injected per query (default 10)profileFrequency: How many turns between full user profile injections (default 50)
12.4 Usage
After installation, most features work automatically, but you can also operate manually:
# Manually remember specific information
/remember My company uses AWS as cloud infrastructure, preferring Terraform management
# Proactively search memories
/recall The database migration plan we discussed last time
# CLI memory operations
openclaw memory search "API design preferences"
openclaw memory status              # View memory index status
openclaw memory index               # Rebuild memory index
The AI itself can also autonomously invoke memory tools: supermemory_store (save), supermemory_search (search), supermemory_forget (delete), and supermemory_profile (read user profile).
12.5 Application Scenarios
The combination of Supermemory and OpenClaw is particularly valuable in these scenarios:
- Long-term project management: Across development projects spanning weeks, OpenClaw remembers all architecture decisions, technology selection rationale, and to-do items, without needing to re-explain background each time
- Seamless multi-device switching: A solution discussed on your computer's Control UI in the morning can be directly continued on your phone's WhatsApp in the afternoon -- memory is unified across channels
- Team shared knowledge base: Through
containerTagshared namespace configuration, multiple people can share the same OpenClaw memory store, accumulating collective team knowledge - Personalized automation: Scheduled tasks combined with memory -- e.g., the daily AI briefing automatically adjusts content filtering priorities based on your past reading preferences
- Customer service scenarios: OpenClaw remembers each customer's interaction history, preferences, and issue records, providing truly personalized service experiences
13. Core Configuration Files Overview
During use, you may need to manually adjust some settings. Here are OpenClaw's key file locations:
~/.openclaw/openclaw.json: Main configuration file (JSON5 format), containing all settings for models, channels, agents, automation, etc. The Gateway automatically detects file changes and hot-reloads~/.openclaw/.env: Environment variables file for storing sensitive information like API Keys~/.openclaw/workspace: Default workspace where OpenClaw-generated files are placed
You can also override default paths via environment variables:
OPENCLAW_HOME-- Set the home directory pathOPENCLAW_STATE_DIR-- Override state directory locationOPENCLAW_CONFIG_PATH-- Override configuration file path
Common CLI configuration commands:
# Read a specific setting value
openclaw config get agents.defaults.workspace
# Modify a setting value
openclaw config set agents.defaults.heartbeat.every "2h"
# Remove a setting value
openclaw config unset tools.web.search.apiKey
# Diagnose and auto-fix
openclaw doctor
openclaw doctor --fix
If OpenClaw exhibits abnormal behavior, first run openclaw doctor to diagnose; for a complete reset, delete the ~/.openclaw/ directory and re-run openclaw setup.
Below are the pitfalls we actually encountered deploying OpenClaw v2026.2.12 on a Vultr VPS (Ubuntu 22.04). These issues are not adequately documented in the official docs but can stall your deployment for tens of minutes or cause outright failure.
- Onboarding Wizard fails in SSH environments.
openclaw onboard --install-daemonrequires an interactive TTY terminal and will directly error out in remote SSH, Docker containers, or CI/CD environments. Solution: Useopenclaw setup+openclaw daemon installfor manual initial setup - Telegram plugin is disabled by default. Even after setting the Bot Token,
openclaw pairing list telegramshows nothing -- because the Telegram plugin defaults toenabled: false. You must manually runopenclaw config set plugins.entries.telegram.enabled trueand restart the Daemon - The
openclaw skills installcommand does not exist. Skills are installed in two ways: (1) System CLI tool auto-detection (e.g.,gh,chromium-browser), (2) Vianpx clawhub install <name>for community Skills (e.g.,sag,nano-pdf). Some Skills also require API Key environment variables (e.g.,OPENAI_API_KEY,GEMINI_API_KEY) - Browser automation fails on headless hosts. Chromium requires a display server; cloud hosts must install
xvfband setDISPLAY=:99, otherwise you get acannot open displayerror - Gateway has no REST API to wake the Agent. The circulating
curl -X POST /api/cron/wakereturns 405 Method Not Allowed. The correct approach is using CLI:openclaw system event --text "..." --mode now --token "$TOKEN" - Claude Code Hooks context data is passed via stdin as JSON. Not environment variables. Callback scripts need to read
session_id,cwd,hook_event_nameand other fields from stdin; ignoring stdin means losing task information - Stop and SessionEnd Hooks trigger in quick succession. Without deduplication (e.g., a 30-second lock file), the same task completion sends two notifications. See reference implementation at claude-code-hooks
- Model setting commands have a simplified version. No need to write the full path
openclaw config set agents.defaults.model.primary "anthropic/..."; just useopenclaw models set "anthropic/claude-opus-4-6". Claude Code subscribers can also useopenclaw models auth paste-tokenfor API Key-free authentication - Claude Code CLI and OpenClaw authentication are separate. Even if OpenClaw has completed authentication via
paste-token, Claude Code CLI still shows "Not logged in." The.credentials.jsonformat is extremely difficult to construct manually. The correct approach is runningclaude setup-tokenlocally to get the OAuth token, then settingexport CLAUDE_CODE_OAUTH_TOKEN="token"as an environment variable on the remote host - coding-agent executes Claude Code as the
coderuser, not root. OpenClaw internally runssu coderto execute the Claude Code CLI. If thecoderuser doesn't exist, password isn't cleared, or that user lacksCLAUDE_CODE_OAUTH_TOKEN, you get exit code 2 or "Authentication failure." You need to manually runuseradd -m -s /bin/bash -U coder && passwd -d coderand set the token in/home/coder/.profile - systemd services don't read
.bashrc. Even if you setCLAUDE_CODE_OAUTH_TOKENin root's.bashrc, the OpenClaw Gateway (managed by systemd) child processes won't inherit it. You must addEnvironment=CLAUDE_CODE_OAUTH_TOKEN=tokento the[Service]section of~/.config/systemd/user/openclaw-gateway.service, then runsystemctl --user daemon-reload npx clawhub installonly installs Skill definitions, not CLI binaries. For example,npx clawhub install sagcreatesSKILL.mdin~/.openclaw/workspace/skills/sag/(telling OpenClaw how to use this Skill), but doesn't install the actualsagexecutable. You still need to install the binary yourself -- for sag on Linux, download from GitHub Releases:curl -sL .../sag_linux_amd64.tar.gz | tar xz && mv sag /usr/local/bin/
14. Security Reminder: Risks You Cannot Ignore
After the excitement of deploying OpenClaw, we must seriously highlight several major security risks.
In early February 2026, security researchers disclosed the CVE-2026-25253 vulnerability (CVSS 8.8 High)[6] -- attackers could gain full control of OpenClaw through cross-site WebSocket hijacking. CrowdStrike's investigation found that among over 42,000 publicly exposed OpenClaw instances, 93.4% had authentication bypass vulnerabilities[7].
Cisco's security team went further[8], stating that personal AI agents like OpenClaw, combining shell access, network connectivity, and prompt injection attack surfaces, are ideal targets for hackers.
Our security recommendations:
- Never expose OpenClaw to the public internet. If remote access is needed, the official documentation recommends using SSH Tunnel or Tailscale -- OpenClaw has built-in Tailscale integration, configurable directly during Onboarding
- Enable Docker sandbox mode. OpenClaw supports Docker isolated execution (sandboxing), applicable to non-primary sessions or all sessions, preventing untrusted input from directly accessing the system
- Update regularly. OpenClaw releases security patches frequently; always keep the latest version
- Limit API Key permissions. Set minimum necessary permissions and usage limits for API Keys used by OpenClaw
- Don't use in production environments. At this stage, OpenClaw is suitable for technical exploration and proof-of-concept, not yet appropriate for handling sensitive enterprise business
| Command | Purpose |
|---|---|
openclaw setup && openclaw daemon install | Initial setup and install Daemon service |
openclaw gateway status | Check Gateway running status |
openclaw dashboard | Open web-based control interface |
openclaw configure | Re-enter the setup wizard |
openclaw models set <model> | Set default model |
openclaw config get/set <key> | Read or modify individual settings |
openclaw doctor --fix | Diagnose issues and auto-fix |
openclaw pairing list <channel> | View channel pairing status |
openclaw skills check | Check detected Skills status |
npx clawhub search/install <name> | Search or install community Skills |
openclaw cron add ... | Add scheduled task |
openclaw cron run <id> --force | Immediately execute scheduled task |
15. Docker Quick Deployment -- One-Click Environment Replication
After going through all fourteen chapters, you might think: the setup steps are clear, but there are simply too many manual dependencies -- Node.js, Chromium, yt-dlp, sag, ffmpeg, ripgrep, GitHub CLI, plus three-layer Claude Code authentication, Telegram plugin configuration, custom Skills... each step can encounter version incompatibilities or environment differences.
Docker is designed to solve this problem. We packaged the entire OpenClaw deployment environment into a Docker image, restoring the complete working environment with a single command -- including all system dependencies, global NPM packages, CLI tools, custom Skills, and Hooks callback scripts.
15.1 Image Contents
This Docker image is based on node:22-bookworm (Debian 12 + Node.js 22), with the following pre-installed components:
- System tools: python3, jq, curl, wget, git, xvfb, chromium, ripgrep, ffmpeg
- NPM global packages: openclaw, @anthropic-ai/claude-code, @google/gemini-cli
- CLI binaries: gh (GitHub CLI), yt-dlp, sag (ElevenLabs TTS)
- Custom Skills: youtube-transcript (subtitle extraction), gemini-image (image generation)
- Hooks scripts: Stop + SessionEnd dual callback, with Telegram notification support
- coder user: Already created with passwordless su configured (required for OpenClaw coding-agent)
15.2 Build the Image
git clone https://github.com/hirosichen/metaintelligence-2026.git
cd metaintelligence-2026
docker build -t openclaw-stack docker/openclaw/
The build process takes approximately 3-5 minutes (depending on network speed), with the final image approximately 2-3 GB.
15.3 Start the Container
API Keys and authentication information are passed via environment variables at startup -- this sensitive information is not baked into the image:
docker run -d --name openclaw \
  -e CLAUDE_CODE_OAUTH_TOKEN="your-oauth-token" \
  -e ANTHROPIC_API_KEY="sk-ant-..." \
  -e TELEGRAM_BOT_TOKEN="123456:ABC..." \
  -e TELEGRAM_GROUP_ID="-5201877902" \
  -e OPENAI_API_KEY="sk-..." \
  -e GEMINI_API_KEY="AIza..." \
  -e ELEVENLABS_API_KEY="..." \
  -e OPENCLAW_MODEL="anthropic/claude-opus-4-6" \
  -p 18789:18789 \
  openclaw-stack
Only CLAUDE_CODE_OAUTH_TOKEN and ANTHROPIC_API_KEY are required; the rest are optional. CLAUDE_CODE_OAUTH_TOKEN can be obtained by running claude setup-token locally.
15.4 Verify Deployment
# Check container logs
docker logs openclaw
# Enter container interactively
docker exec -it openclaw bash
# Check Gateway status
docker exec openclaw openclaw gateway status
# Check Skills detection
docker exec openclaw openclaw skills check
# Test Claude Code (as coder user)
docker exec openclaw su - coder -s /bin/bash -c "claude -p 'hello'"
15.5 Important Notes
- API Keys are personal: The image contains no authentication information; each user must apply for and provide their own API Keys
- OAuth Token valid for approximately one year: When
CLAUDE_CODE_OAUTH_TOKENexpires, re-runclaude setup-tokento obtain a new token - Data persistence: Conversation history and memories inside the container are lost when the container is deleted. For persistence, mount a volume:
-v openclaw-data:/home/coder/.openclaw - Security: Follow all recommendations in Section 14: Security Reminder. The Docker container itself provides a layer of isolation, but API Key leakage risks still require attention
16. Summary & Outlook
From installation to completing six real-world scenarios, the entire process takes less than an hour. OpenClaw has indeed transformed "AI autonomous agents" from an abstract concept into a tool you can use immediately -- install with one command, scan a QR code to connect your phone, then command AI with natural language.
But we need to stay clear-headed: the tension between usability and security is OpenClaw's biggest contradiction today. It lets AI control your entire computer, which is both its biggest selling point and its biggest risk. At this stage where the security architecture is not yet fully mature, we recommend treating OpenClaw as a learning and experimentation tool, not a productivity core.
The AI agent era has arrived -- there is no question about that. OpenClaw's explosive popularity proves the enormous market demand for "AI automation." Whether or not you end up using OpenClaw long-term, spending an hour going through this tutorial and experiencing how AI agents work firsthand will help you more deeply understand the direction of AI industry development over the next one to two years.
If your enterprise is evaluating AI agent and automation tool adoption strategies, we welcome a deep conversation with our research team. We will continue tracking OpenClaw and similar products, helping clients make the most appropriate technology decisions in an era of flourishing tools.