Haven't installed OpenClaw yet? Click here for one-line install commands
curl -fsSL https://openclaw.ai/install.sh | bashiwr -useb https://openclaw.ai/install.ps1 | iexcurl -fsSL https://openclaw.ai/install.cmd -o install.cmd && install.cmd && del install.cmd- Slack is a core enterprise team collaboration platform, and integrating it with OpenClaw embeds AI agent capabilities directly into the team's daily workflow, enabling automated tasks without switching tools[1]
- The complete integration process covers four major steps: Create a Slack App -> Configure Bot Token and App-Level Token -> Enable Event Subscriptions -> Complete Pairing verification, taking approximately 15-20 minutes[3]
- OpenClaw's Slack integration supports both Socket Mode and HTTP Webhook connection modes — Socket Mode eliminates the need for a public endpoint and is ideal for development and internal deployments; HTTP mode is suitable for high-traffic enterprise environments[9]
- Through Channel Allowlist and Group Policy, enterprises can precisely control which channels the AI agent responds in and who can trigger commands, ensuring information security and compliance[7]
- Slack Enterprise Grid integration enables multi-workspace organizations to manage cross-team AI agents with unified policies, combined with Slash Commands and Interactive Messages for complete enterprise-grade AI automation workflows[5]
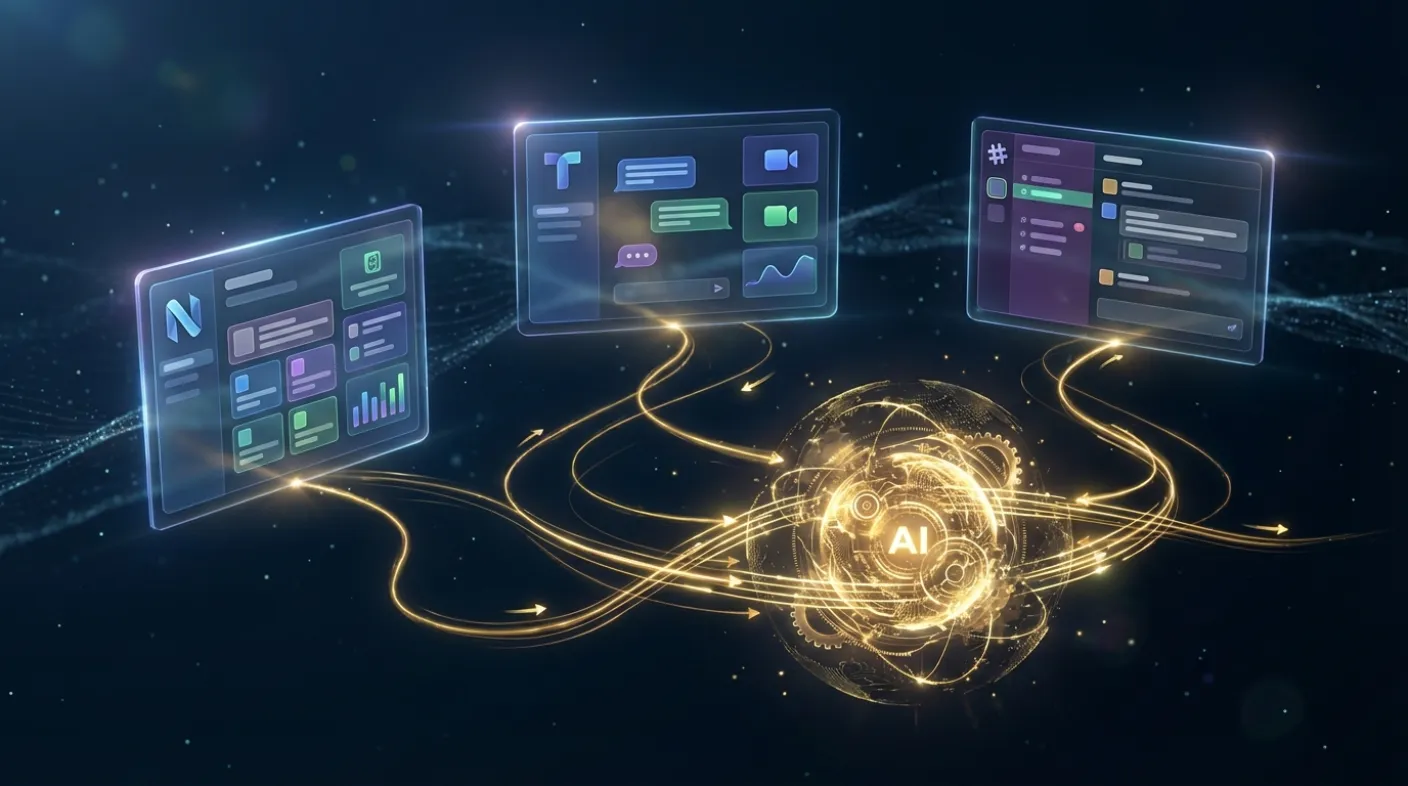
1. Why Choose Slack x OpenClaw?
Among the many messaging channels, Slack occupies a central position in enterprise collaboration. According to Slack's 2025 Work Report, over 750,000 enterprises worldwide use Slack as their primary tool for daily communication and project management, generating billions of messages daily.[6] When a team's workflow is already deeply integrated into the Slack ecosystem, embedding AI agents directly into the Slack workspace — rather than requiring team members to switch to a separate AI interface — is the most efficiency-maximizing strategic choice.
OpenClaw, as an open-source AI agent framework, integrates seamlessly with workspaces via the Slack Bot API, enabling teams to interact with the AI agent directly within their familiar channel environment.[8] This means:
- Zero learning curve: Team members don't need to learn new tools — just @mention the agent in a Slack channel to issue commands
- Context retention: The AI agent can read the channel's conversation context, understand the team's discussion, and respond based on context
- Multi-channel, multi-agent: Different channels can have different AI agents, e.g., the #dev-ops channel uses an infrastructure management agent, the #customer-support channel uses a customer service agent
- Complete audit trail: All agent operations are automatically recorded in Slack channels, meeting enterprise compliance requirements
- Native notification integration: Agent replies trigger Slack's notification system, so team members receive instant push notifications
Compared to Telegram's personalized remote control scenarios, the Slack x OpenClaw integration is better suited for team collaboration, enterprise automation, and organization-level AI deployment. The following sections walk through the complete integration process from scratch.
2. Prerequisites
Before starting the integration, confirm the following environments and permissions are ready:[4]
2.1 Slack Requirements
- Slack workspace: You need a Slack Workspace you control (free or paid)
- Admin permissions: You must be the workspace Owner or Admin to create a Slack App and install it
- Slack account: For logging into the api.slack.com management console
2.2 OpenClaw Requirements
- OpenClaw installed: If not yet installed, see the one-click install commands at the top of this article or read the Architecture Deep Dive and Deployment Guide
- Gateway running: Slack integration requires the OpenClaw Gateway to be continuously running to receive and relay messages[5]
- At least one AI agent configured: Confirm you've completed the agent's basic configuration (model selection, System Prompt, etc.)
Check Gateway status:
openclaw gateway statusIf the Gateway is not yet started:
openclaw gateway start2.3 Network Requirements
OpenClaw's Slack integration supports two connection modes:
| Mode | Requirements | Suitable Scenarios |
|---|---|---|
| Socket Mode | Only outbound HTTPS connection needed | Development testing, behind-firewall deployment, no public IP environments |
| HTTP Webhook | Requires a public HTTPS endpoint (or ngrok/Cloudflare Tunnel) | High-traffic production environments, Enterprise Grid deployments |
Recommendation: For first-time setup, use Socket Mode — no public endpoint needed, ideal for quick onboarding. Switch to HTTP Webhook mode later as needs grow.
3. Step 1: Create a Slack App and Bot Token
This is the core step of the entire integration — creating an App on the Slack platform and obtaining the necessary Tokens and permissions.[2][3]
3.1 Create a Slack App
- Go to api.slack.com/apps and click "Create New App"
- Select "From scratch"
- Enter the App name (e.g.,
OpenClaw Agent) and select the target workspace - Click "Create App"
After creation, you'll be taken to the App's settings page. Next, configure the necessary permissions and Tokens.
3.2 Configure Bot Token Scopes
In the left menu, go to "OAuth & Permissions" and scroll down to the "Scopes" section. Under Bot Token Scopes, add the following permissions:[3]
| Scope | Purpose | Necessity |
|---|---|---|
app_mentions:read | Read messages that @mention the agent | Required |
chat:write | Agent sends messages in channels | Required |
channels:history | Read public channel message history | Required |
channels:read | List public channels in the workspace | Required |
groups:history | Read private channel message history | Optional |
groups:read | List private channels the agent belongs to | Optional |
im:history | Read DM history | Optional |
im:read | List the agent's DM conversations | Optional |
im:write | Agent sends DMs | Optional |
files:write | Agent uploads files to channels | Optional |
files:read | Read files in channels | Optional |
reactions:write | Agent adds emoji reactions to messages | Optional |
commands | Register Slash Commands | Needed for advanced features |
users:read | Query user information | Optional |
Minimum required configuration: If you only need basic "@mention -> agent reply" functionality, only add app_mentions:read, chat:write, channels:history, and channels:read.
3.3 Install the App to the Workspace
Return to the top of the "OAuth & Permissions" page and click "Install to Workspace". Slack will show an authorization confirmation screen listing all permissions you just configured. After confirming, click "Allow".
After installation, the page will display two Tokens:
- Bot User OAuth Token: In the format
xoxb-..., this is the primary Token for agent communication with Slack - User OAuth Token (if configured): In the format
xoxp-..., not needed for this guide
Copy the Bot User OAuth Token (xoxb-...) — you'll need it in subsequent steps.
3.4 Enable Socket Mode and Obtain App-Level Token
If you choose to use Socket Mode (recommended for initial setup):
- In the left menu, go to "Socket Mode"
- Enable "Enable Socket Mode"
- The system will ask you to create an App-Level Token — enter a name (e.g.,
openclaw-socket) and select theconnections:writeScope - Click "Generate"
The generated App-Level Token will be in the format xapp-.... Copy and save this as well.
4. Step 2: OpenClaw Configuration
With the Slack Bot Token and App-Level Token in hand, configure them in OpenClaw.[1]
4.1 Set the Bot Token
openclaw config set channels.slack.botToken "xoxb-your-bot-token"4.2 Set the App-Level Token (Socket Mode)
openclaw config set channels.slack.appToken "xapp-your-app-level-token"4.3 Enable the Slack Channel
openclaw config set channels.slack.enabled true4.4 Set the Connection Mode
Specify Socket Mode for OpenClaw:
openclaw config set channels.slack.mode "socket"If using HTTP Webhook mode instead:
openclaw config set channels.slack.mode "http"
openclaw config set channels.slack.webhookPort 3001
4.5 Verify Settings
Use the following command to confirm all Slack-related settings are properly saved:
openclaw config get channels.slackExpected output:
{
"enabled": true,
"mode": "socket",
"botToken": "xoxb-****",
"appToken": "xapp-****"
}
4.6 Restart the Gateway
After configuration, restart the Gateway for changes to take effect:
openclaw gateway restartWatch the Gateway logs to confirm Slack connection is successful:
openclaw logs --follow --limit 20If you see a message like [slack] Connected via Socket Mode, the connection is successful.
5. Step 3: Event Subscriptions and Webhooks
OpenClaw needs to receive events from Slack (such as message events when a user @mentions the agent) to trigger AI agent responses. This requires configuring Slack's Event Subscriptions.[9]
5.1 Event Subscriptions in Socket Mode
If using Socket Mode, events are delivered to OpenClaw directly via WebSocket, with no public Request URL needed. Setup steps:
- In the Slack App settings, go to "Event Subscriptions" in the left menu
- Enable "Enable Events"
- Since Socket Mode is enabled, the system won't ask for a Request URL
- Under "Subscribe to bot events", add the following events:
| Event Name | Function | Necessity |
|---|---|---|
app_mention | Triggered when someone @mentions the agent | Required |
message.channels | New messages in public channels | Optional (full channel monitoring) |
message.groups | New messages in private channels | Optional |
message.im | New messages in agent DMs | Optional |
Click "Save Changes".
5.2 Event Subscriptions in HTTP Webhook Mode
If you choose HTTP Webhook mode, you need to provide a publicly accessible HTTPS endpoint for Slack:
- Ensure the OpenClaw Gateway is accessible via a public URL (e.g., via Cloudflare Tunnel or ngrok)
- Enable "Enable Events" under "Event Subscriptions"
- Enter your public endpoint in "Request URL":
https://your-domain.com/api/slack/eventsSlack will immediately send a verification request (challenge request) to this URL, which the OpenClaw Gateway handles automatically. If verification succeeds, a green "Verified" badge will appear next to the URL.
Using ngrok for local development testing:
# Start an ngrok tunnel (assuming Gateway listens on port 3001)
ngrok http 3001

# ngrok will generate a temporary public URL, e.g.:
# https://abc123.ngrok-free.app
# Use this URL plus path as the Request URL
5.3 Verify Event Reception
After setup, invite your Bot to any public channel in the Slack workspace (type /invite @OpenClaw Agent), then @mention the agent:
@OpenClaw Agent Hello, please confirm connection statusIf everything is working, the agent should reply within seconds. If there's no response, refer to the troubleshooting section later in this article.
6. Step 4: Channel Permissions and Group Policy
In enterprise environments, you won't want the AI agent responding in every channel — some channels involve confidential information, others aren't appropriate for AI intervention. OpenClaw provides fine-grained channel permission management.[7][10]
6.1 Channel Allowlist
Restrict the agent to only respond in specific channels:
# Get Channel ID (right-click channel name in Slack -> Copy link, ID is the last segment of the URL)
# e.g., C0123456789

openclaw config set channels.slack.allowedChannels '["C0123456789", "C9876543210"]'
Once set, the agent will only respond to @mentions in allowlisted channels; messages in other channels will be ignored.
6.2 Channel Denylist
If you want the agent to respond in most channels but exclude specific sensitive ones:
openclaw config set channels.slack.deniedChannels '["C1111111111"]'Note: allowedChannels and deniedChannels should not be used simultaneously. If both are set, allowedChannels takes priority.
6.3 DM Policy
Control who can DM the agent directly via Slack:
- owner_only (default): Only the paired owner can DM the agent
- allowlist: Only Slack User IDs on the allowlist can DM the agent
- workspace: All workspace members can DM the agent
- disabled: Completely disable DM functionality
openclaw config set channels.slack.dmPolicy "owner_only"If using allowlist mode, set the allowed User IDs:
# User IDs can be found in Slack profiles (starts with U)
openclaw config set channels.slack.allowedUsers '["U0123456789", "U9876543210"]'
6.4 Pairing Verification
Similar to the Telegram integration, the first connection requires completing Pairing to ensure only authorized users can control the agent:[10]
- DM the agent in Slack or @mention it in an allowed channel
- The agent will reply with "Pairing Required" and display a six-digit pairing code
- In your terminal, view and approve the pairing:
# List pending pairing requests
openclaw pairing list

# Approve the pairing request
openclaw pairing approve

# Or approve a specific pairing code
openclaw pairing approve --code 123456
Once pairing is complete, the agent will reply with a confirmation message in Slack, and you can interact normally from then on.
7. Advanced Features: Slash Commands and Interactive Messages
Basic @mention interaction covers most needs, but Slack's Slash Commands and Interactive Messages can make AI agent operations more structured and intuitive.[2]
7.1 Register Slash Commands
Slash Commands let users quickly trigger specific agent functions using the /command format:
- In the Slack App settings page, go to "Slash Commands"
- Click "Create New Command"
- Set the command parameters:
| Field | Example | Description |
|---|---|---|
| Command | /claw | Trigger command (use a short, memorable name) |
| Request URL | Leave empty for Socket Mode | Fill in the endpoint URL for HTTP mode |
| Short Description | Issue a command to the AI agent | Description shown when users type / |
| Usage Hint | [task description] | Hint for how to input parameters |
After configuration, OpenClaw will automatically handle Slash Command events. Type in Slack:
/claw Analyze this week's #sales channel discussion summary and compile it into a reportThe agent will receive the command and begin executing the task.
7.2 Multi-Command Configuration
You can register multiple Slash Commands for different tasks and map them to different agents or Skills on the OpenClaw side:
openclaw config set channels.slack.commands '{
"/claw": {"agent": "default", "description": "General AI agent"},
"/claw-dev": {"agent": "coding", "description": "Coding development agent"},
"/claw-ops": {"agent": "devops", "description": "Infrastructure management agent"},
"/claw-report": {"agent": "analyst", "description": "Data analysis and reporting agent"}
}'
7.3 Interactive Messages
OpenClaw can send interactive messages via Slack's Block Kit featuring buttons, menus, and forms, letting users interact with the agent through clicks rather than text input.
Enable interactive features:
- In the Slack App settings page, go to "Interactivity & Shortcuts"
- Enable "Interactivity" (no Request URL needed for Socket Mode)
- Enable interactive message support on the OpenClaw side:
openclaw config set channels.slack.interactivity trueOnce enabled, the agent can send interactive messages such as:
- Confirmation buttons: Before executing high-risk operations, the agent sends confirmation buttons for user approval
- Option menus: The agent presents multiple options for the user to choose from
- Form collection: The agent collects structured information through Modal forms
8. Advanced Features: Threads and Multi-Channel Management
In team environments, good conversation management is essential. OpenClaw's Slack integration supports Thread replies and multi-channel agent management.
8.1 Thread Reply Mode
By default, agent replies are sent directly to the channel. In active channels, this can cause message clutter. You can set the agent to reply in threads:
openclaw config set channels.slack.replyInThread trueOnce enabled, every agent reply becomes a Thread reply to the original message, keeping the channel clean. Users can also continue chatting with the agent within the Thread, forming an independent context space.
8.2 Thread Context Settings
When replying in threads, the agent can read all previous messages in the Thread as context:
# Set maximum Thread messages the agent reads
openclaw config set channels.slack.threadContextLimit 50
This means the agent reads the most recent 50 Thread messages for conversation context. For long conversations, set a reasonable limit to avoid excessive Token usage.
8.3 Multi-Channel Multi-Agent Architecture
Large organizations typically need different AI agents in different channels. OpenClaw supports the following architecture:[5]
openclaw config set channels.slack.channelAgents '{
"C0123456789": {"agent": "customer-support", "model": "claude-sonnet-4-20250514"},
"C9876543210": {"agent": "devops", "model": "claude-opus-4-20250514"},
"C1111111111": {"agent": "data-analyst", "model": "gpt-4o"}
}'
This configuration lets:
#customer-supportchannel use a dedicated customer service agent with the faster Sonnet model#devopschannel use an infrastructure management agent with the more reasoning-capable Opus model#data-analysischannel use a data analysis agent with the GPT-4o model
Each channel's agent has independent System Prompts, Skill sets, and model settings, fully isolated.
8.4 Cross-Channel Message Forwarding
In some scenarios, you may want the agent to forward results from one channel to another. For example, after detecting an anomaly in the #alerts channel, automatically send a summary to the #devops channel:
openclaw config set channels.slack.crossChannelForward trueSecurity reminder: When enabling cross-channel forwarding, ensure the agent doesn't leak information from sensitive channels to inappropriate ones. We recommend using it with Channel Allowlist.
9. Enterprise Deployment: Slack Enterprise Grid Integration
For large organizations using Slack Enterprise Grid, OpenClaw provides additional integration capabilities.[5]
9.1 Org-Wide App Deployment
Enterprise Grid allows deploying a Slack App as an Org-Wide App — install once and use across all workspaces:
- In the Slack App settings, go to "Org Level Apps"
- Enable "Opt into Org-Wide App Installation"
- Have the organization admin approve the installation
Once installed, OpenClaw's Bot Token will have cross-workspace access, suitable for enterprises requiring unified management.
9.2 Multi-Workspace Agent Management
In Enterprise Grid environments, you can configure different agent policies for different workspaces:
openclaw config set channels.slack.enterprise '{
"orgId": "E0123456789",
"workspaceOverrides": {
  "T111": {"agent": "engineering", "allowedChannels": ["C111", "C222"]},
  "T222": {"agent": "sales", "allowedChannels": ["C333", "C444"]},
  "T333": {"agent": "hr", "dmPolicy": "disabled"}
}
}'
9.3 Compliance and Auditing
Enterprise environments have strict audit trail requirements. OpenClaw's Slack integration automatically records:
- All agent interaction records: Who, when, from which channel, issued what command
- Agent execution logs: What operations the agent performed and the results
- Token usage: LLM Tokens consumed per interaction
View audit logs:
openclaw logs --channel slack --format json --since "7d"These logs can be exported to enterprise SIEM systems (such as Splunk, Datadog) for centralized management.[7]
9.4 Rate Limits and Quota Management
To prevent AI agent usage from spiraling out of control, we recommend setting rate limits:
# Maximum interactions per user per hour
openclaw config set channels.slack.rateLimits.perUser 60

# Maximum interactions per channel per hour
openclaw config set channels.slack.rateLimits.perChannel 200

# Global daily maximum Token consumption
openclaw config set channels.slack.rateLimits.dailyTokenLimit 1000000
When limits are exceeded, the agent will reply with a friendly message rather than going silent.
10. Complete Configuration Example: openclaw.json
Here is a complete Slack integration configuration example covering all features introduced in this article:
{
"gateway": {
  "enabled": true,
  "port": 3000
},
"channels": {
  "slack": {
    "enabled": true,
    "mode": "socket",
    "botToken": "xoxb-your-bot-token",
    "appToken": "xapp-your-app-level-token",
    "replyInThread": true,
    "threadContextLimit": 50,
    "interactivity": true,
    "dmPolicy": "allowlist",
    "allowedUsers": ["U0123456789", "U9876543210"],
    "allowedChannels": ["C0123456789", "C9876543210"],
    "channelAgents": {
      "C0123456789": {
        "agent": "general",
        "model": "claude-sonnet-4-20250514"
      },
      "C9876543210": {
        "agent": "devops",
        "model": "claude-opus-4-20250514"
      }
    },
    "commands": {
      "/claw": {"agent": "default"},
      "/claw-dev": {"agent": "coding"},
      "/claw-ops": {"agent": "devops"}
    },
    "rateLimits": {
      "perUser": 60,
      "perChannel": 200,
      "dailyTokenLimit": 1000000
    }
  }
}
}
Note: In actual deployment, Bot Token and App-Level Token should not be hardcoded in the configuration file. We recommend using environment variables:
export OPENCLAW_SLACK_BOT_TOKEN="xoxb-..."
export OPENCLAW_SLACK_APP_TOKEN="xapp-..."
Then reference them in openclaw.json:
{
"channels": {
  "slack": {
    "botToken": "${OPENCLAW_SLACK_BOT_TOKEN}",
    "appToken": "${OPENCLAW_SLACK_APP_TOKEN}"
  }
}
}
11. Troubleshooting
The following compiles the most common problems and solutions encountered during Slack x OpenClaw integration:[1][9]
| Problem | Possible Cause | Solution |
|---|---|---|
| Agent completely unresponsive | Gateway not running, Token incorrect, or Slack channel not enabled | Run openclaw gateway status to confirm Gateway is running; use openclaw config get channels.slack to check Token; confirm enabled is true |
invalid_auth error |
Bot Token format incorrect or expired | Go to Slack App settings OAuth & Permissions page and re-copy the Token; confirm it starts with xoxb- |
| Socket Mode connection failure | App-Level Token invalid or Socket Mode not enabled | Confirm App-Level Token starts with xapp-; verify Socket Mode is enabled in Slack App settings |
| Agent doesn't respond in certain channels | Channel Allowlist restriction or Bot not invited to channel | Check allowedChannels settings; invite the Bot to the target channel with /invite @YourBotName |
| Pairing Required keeps appearing | Pairing not completed or expired | Run openclaw pairing list to check status; re-run openclaw pairing approve |
| HTTP Webhook verification fails | URL unreachable or Gateway not listening on correct port | Confirm public URL is accessible; check webhookPort matches Gateway; verify HTTPS certificate is valid |
| No events received in Event Subscriptions | Not subscribed to correct event types | Return to Slack App settings and confirm app_mention and other required events are subscribed |
| Agent reply delay exceeds 30 seconds | LLM response time too long or network latency | Switch to a faster model (Haiku or Sonnet); check Gateway server network latency |
| Slash Command not working | Not registered in Slack App or commands Scope not added |
Confirm Slash Command is created in Slack App settings; confirm Bot Token Scopes include commands |
| Interactive button clicks unresponsive | Interactivity not enabled | Confirm Interactivity & Shortcuts is enabled in Slack App; confirm interactivity is true on OpenClaw side |
| Cross-channel forwarding permission error | Bot lacks chat:write permission in target channel |
Confirm Bot is invited to the target channel with write permission |
Rate Limit error (429 Too Many Requests) |
Exceeded Slack API rate limit | Slack's API rate limit is approximately 1 message per second (tier 1); reduce agent reply frequency or use Slack's Retry-After header |
11.1 Diagnostic Commands Quick Reference
Most commonly used diagnostic commands for troubleshooting:
# Check Gateway status
openclaw gateway status

# View real-time logs
openclaw logs --follow --limit 50

# Check all channel connection statuses
openclaw channels status

# Check complete configuration
openclaw config get channels.slack

# List all paired devices
openclaw pairing list
11.2 Log Level Adjustment
For hard-to-locate issues, increase the Slack channel's log level:
openclaw config set channels.slack.logLevel "debug"
openclaw gateway restart
Debug mode records all Slack API requests and responses, helping pinpoint the issue root cause. Remember to set the log level back to info after troubleshooting.
12. Security Best Practices
Connecting an AI agent to a Slack workspace is equivalent to introducing an autonomous agent with computer operation capabilities into your team's core communication platform. The following security principles must be followed:[7][8]
- Principle of least privilege: Only grant the agent necessary Slack Scopes. If the agent only needs to respond to @mentions, don't give it
files:writeorim:writepermissions - Use Channel Allowlist: Explicitly list channels where the agent can operate to prevent accidental access to sensitive channels
- Set strict DM Policy: For production environments, use
owner_onlyorallowlist— never useworkspace - Token security management: Bot Token and App-Level Token must be managed via environment variables, not committed to version control
- Regularly rotate Tokens: Regenerate Tokens every 90 days and update on the OpenClaw side
- Enable interactive confirmations: For high-risk operations (file deletion, deployment, database modification), require the agent to send confirmation buttons first
- Monitor audit logs: Regularly review agent interaction logs to confirm no abnormal operations
- Limit agent Skill permissions: Only install Skills the agent needs to avoid granting excessive system access capabilities
- Set rate limits: Prevent agent abuse or accidental triggering of excessive operations
- Isolate production and test environments: Use different Slack Apps and Bot Tokens to isolate production and test environment agents
Conclusion
The Slack x OpenClaw integration elevates the AI agent from a personal tool to a team-level intelligent collaboration partner. Team members can interact with the AI agent right in their everyday Slack channels — no need to open a terminal, learn new tools, or leave their workflow.[8]
From a technical perspective, this guide covers the complete integration process: from Slack App creation, Bot Token and App-Level Token configuration, Event Subscriptions setup (both Socket Mode and HTTP Webhook modes), fine-grained channel permission management, to advanced features like Slash Commands, Interactive Messages, and Thread management, and extending to Enterprise Grid deployment for enterprise-level scenarios.[1][5]
The core philosophy of the entire integration process is security first: Pairing mechanism, Channel Allowlist, DM Policy, and rate limits — these layered security protections ensure the AI agent's controllability and compliance in enterprise environments.[7]
If you're using OpenClaw for the first time, we recommend reading the Architecture Deep Dive and Deployment Guide to complete basic installation and setup first. To explore other messaging channel integrations, see the Complete Platform Integration Guide. For security concerns, refer to the Security Deep Dive for the full security architecture.
Need further deployment assistance? Contact Meta Intelligence — our team can design a custom AI agent integration solution for your enterprise, from architecture planning to launch support.