Haven't installed OpenClaw yet? Click here for one-line install commands
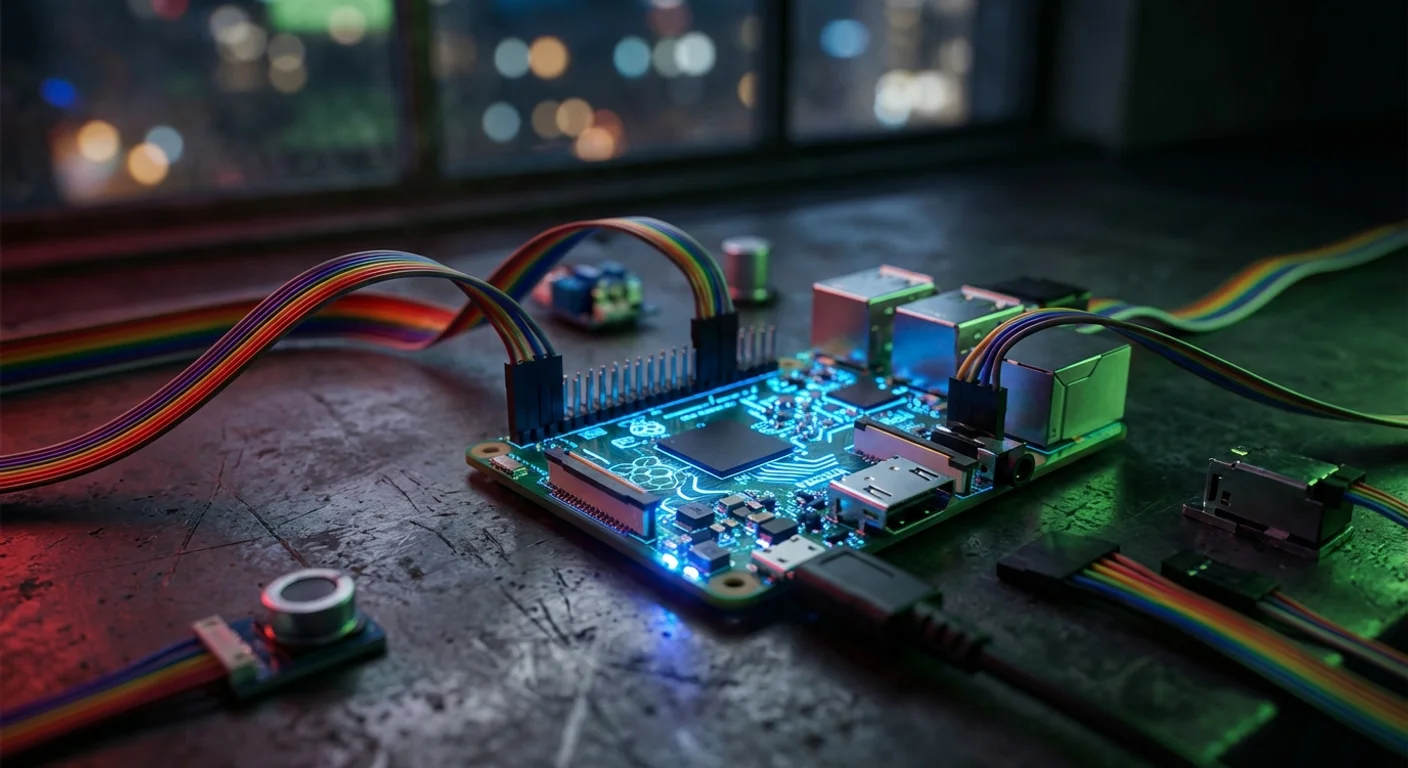
curl -fsSL https://openclaw.ai/install.sh | bashiwr -useb https://openclaw.ai/install.ps1 | iexcurl -fsSL https://openclaw.ai/install.cmd -o install.cmd && install.cmd && del install.cmd- Raspberry Pi 5, equipped with a Broadcom BCM2712 quad-core Cortex-A76 (2.4 GHz) and up to 8GB LPDDR4X RAM, is capable of running the full OpenClaw Gateway + Node agent stack, with measured idle power consumption of only 3-5W[2]
- OpenClaw's Gateway Headless mode natively supports the ARM64 architecture. Through
systemdservices, it achieves auto-start on boot, automatic restart, and log management, enabling stable 24/7 operation without a graphical interface[4] - In IoT edge scenarios, the OpenClaw agent on a Raspberry Pi can directly integrate temperature/humidity sensors, access control systems, and camera modules via GPIO or USB, creating a closed-loop workflow from data collection to LLM decision-making[3]
- Tailscale zero-configuration VPN combined with Gateway Token authentication lets you securely control field-deployed Raspberry Pi agents remotely from any device, eliminating the complexity of dynamic DNS and port forwarding[9]
- Multiple Raspberry Pis can form a Node cluster connected to the same Gateway, enabling distributed edge computing — each unit handles sensing and execution for a different zone, while the Gateway centrally orchestrates tasks[3]
1. Why Run OpenClaw on a Raspberry Pi
When most people talk about AI agents, the image that comes to mind is typically cloud servers, high-performance GPU clusters, or at least a desktop computer running Ubuntu Server. But OpenClaw's architectural design — the separated Gateway + Node architecture — is naturally suited for running on resource-constrained edge devices.[7]
As the world's most popular single-board computer, with cumulative sales exceeding 60 million units, the Raspberry Pi has long established a vast ecosystem in IoT, edge computing, and education. Deploying OpenClaw on a Raspberry Pi means you can use a credit card-sized circuit board to establish an always-on, low-power, remotely controllable AI agent node at any physical location.[2]
Core advantages:
- Exceptional cost-effectiveness: The Raspberry Pi 5 (8GB) costs only US$80. Including the power supply and SD card, total cost is under US$120 — compared to monthly cloud VPS fees, it pays for itself within 6 months
- Low-power continuous operation: Idle power consumption of 3-5W, full load under 12W, with annual electricity costs of approximately US$7-14, making it ideal for 24/7 unattended scenarios
- Physical world interface: GPIO, CSI camera port, USB, and other hardware interfaces let the AI agent interact directly with sensors, relays, and cameras — something pure cloud solutions cannot do
- Privacy and data sovereignty: Sensitive IoT data never leaves the premises; only processed summaries or decision results are uploaded to the cloud
- Education and prototyping: Rapidly validate AI + IoT integration solutions, going from concept to working prototype in just hours
OpenClaw does not run LLM inference on the Raspberry Pi — it calls cloud-hosted large language models (such as Claude, GPT-4o, Gemini) via API, while the Raspberry Pi handles task orchestration, sensor data collection, command execution, and result reporting. This "edge execution + cloud inference" hybrid architecture perfectly matches the Raspberry Pi's hardware capabilities.[1]
2. Hardware Requirements and Model Comparison
Not all Raspberry Pi models are suitable for running OpenClaw. The memory requirements of the Gateway and Node determine the minimum hardware threshold, while CPU performance affects task scheduling response times. Here is a comparison of three mainstream models:[2]
| Specification | Raspberry Pi 5 (8GB) | Raspberry Pi 4 (8GB) | Raspberry Pi Zero 2 W |
|---|---|---|---|
| SoC | BCM2712, 4x Cortex-A76 @ 2.4 GHz | BCM2711, 4x Cortex-A72 @ 1.8 GHz | RP3A0, 4x Cortex-A53 @ 1.0 GHz |
| RAM | 8GB LPDDR4X | 8GB LPDDR4 | 512MB LPDDR2 |
| Storage | microSD / NVMe (M.2 HAT) | microSD / USB SSD | microSD |
| Idle Power | 3-5W | 3-4W | 0.4-0.8W |
| Full Load Power | 10-12W | 6-8W | 1.5-2W |
| Price (reference) | US$80 | US$75 | US$15 |
| OpenClaw Gateway | Recommended | Viable | Not recommended |
| OpenClaw Node | Recommended | Recommended | Lightweight tasks only |
| Use Case | Gateway + multi-Node / complex IoT | Single Gateway + single Node / general IoT | Remote Node sensor endpoint only |
Purchase recommendations:
- Top choice: Pi 5 (8GB): The Cortex-A76's single-core performance is roughly 2-3x that of Pi 4's A72, and the Node.js V8 engine benefits significantly from JIT compilation on this architecture. NVMe support eliminates I/O bottlenecks
- Budget option: Pi 4 (4GB/8GB): Still capable of running the full OpenClaw agent stack, with the most abundant community resources and mature cooling solutions
- Pi Zero 2 W as sensor node only: 512MB RAM is insufficient to run both Gateway and Node simultaneously, but it can serve as a lightweight remote Node connected to a Gateway running on another machine
Additional accessories checklist:
- Official 27W USB-C power supply (Pi 5) or 15W (Pi 4) — insufficient power is the most common stability issue
- At least 32GB A2-rated microSD card (64GB recommended) or NVMe SSD (Pi 5 with M.2 HAT)
- Passive heatsink case or official active cooler — active cooling is recommended for prolonged 24/7 operation
- Ethernet cable (wired connection is more stable and lower latency than Wi-Fi)
3. Step 1: Raspberry Pi OS Preparation and Node.js Installation
OpenClaw runs on the Node.js runtime, so the first step is to prepare the operating system and Node.js. The following steps use Raspberry Pi 5 + Raspberry Pi OS (64-bit, Bookworm) as an example; the process for Pi 4 is identical.[5]
3.1 Flash Raspberry Pi OS
Use Raspberry Pi Imager to flash the latest 64-bit Lite version. The Lite version excludes the desktop environment, saving approximately 2GB of disk space and 200MB+ of RAM — for headless edge deployment, you don't need a graphical interface.
In the Imager's advanced settings, pre-configure the following:
- Enable SSH (password or public key authentication)
- Set Wi-Fi SSID and password (if not using Ethernet)
- Set hostname (e.g.,
openclaw-edge-01) - Set user account and password
3.2 First Boot and System Update
Insert the SD card into the Raspberry Pi, connect power and Ethernet cable, wait approximately 30 seconds, then connect via SSH:
# SSH into the Raspberry Pi from your computer
ssh [email protected]

# Update the system immediately after first login
sudo apt update && sudo apt full-upgrade -y

# Install essential build tools and libraries
sudo apt install -y build-essential git curl wget
3.3 Install Node.js (ARM64 Official Build)
OpenClaw requires Node.js 20.x or above. The default APT repository in Raspberry Pi OS typically only provides older versions, so installing via NodeSource or nvm is recommended.[5]
# Method 1: Using nvm (recommended for flexible multi-version management)
curl -o- https://raw.githubusercontent.com/nvm-sh/nvm/v0.40.1/install.sh | bash
source ~/.bashrc
nvm install 22
nvm alias default 22

# Verify installation
node -v   # Expected output: v22.x.x
npm -v    # Expected output: 10.x.x

# Method 2: Using NodeSource (system-level installation)
curl -fsSL https://deb.nodesource.com/setup_22.x | sudo -E bash -
sudo apt install -y nodejsNote: Make sure to confirm that the arm64 version is installed. On Pi 5/4 with 64-bit OS, uname -m should return aarch64. If you are using a 32-bit OS, OpenClaw will not function properly.
4. Step 2: OpenClaw Installation and Initialization
With the system environment ready, the OpenClaw installation process is identical to desktop Linux — this is one of the advantages of OpenClaw's cross-platform architecture.[1]
4.1 Run the Installation Script
# One-line OpenClaw installation
curl -fsSL https://openclaw.ai/install.sh | bash

# After installation, reload the shell environment
source ~/.bashrc

# Verify installation
openclaw --version
The installation script automatically detects the ARM64 architecture and downloads the corresponding binary. The entire process takes approximately 1-2 minutes on Pi 5.
4.2 Initialization and LLM API Key Configuration
When launching OpenClaw for the first time, the system will guide you through initialization:
# Launch the initialization wizard
openclaw onboard

# Set up LLM provider API key (using Anthropic as an example)
openclaw models auth setup-token --provider anthropic

# Or use environment variables (recommended for production environments)
export ANTHROPIC_API_KEY=sk-ant-xxxxx
echo 'export ANTHROPIC_API_KEY=sk-ant-xxxxx' >> ~/.bashrc
Model selection advice: In Raspberry Pi IoT scenarios, most tasks (sensor data interpretation, scheduled triggers, simple decisions) don't require the most powerful models. Using Claude 3.5 Haiku or GPT-4o-mini can keep the cost per API call below US$0.001 while maintaining sufficient reasoning capability.[1]
4.3 Verify Gateway Startup
# Start the Gateway and confirm status
openclaw gateway start
openclaw gateway status

# Expected output
# Gateway Status: running
# Mode: local
# Address: ws://127.0.0.1:18789
# Connected Nodes: 0
# Architecture: aarch64
If you see the running status, congratulations — your Raspberry Pi is now successfully running an OpenClaw Gateway. Next, we'll configure it for stable unattended operation.
5. Step 3: Gateway Headless Mode Configuration
The most important configuration for running OpenClaw on a Raspberry Pi is ensuring the Gateway runs continuously in the background in Headless mode. Through systemd service management, you can achieve auto-start on boot, automatic restart on failure, and structured log management.[4]
5.1 Create the systemd Service File
# Create the systemd service file
sudo nano /etc/systemd/system/openclaw-gateway.service
Enter the following content:
[Unit]
Description=OpenClaw Gateway Service
After=network-online.target
Wants=network-online.target

[Service]
Type=simple
User=pi
Group=pi
WorkingDirectory=/home/pi
Environment=NODE_ENV=production
Environment=ANTHROPIC_API_KEY=sk-ant-xxxxx
ExecStart=/home/pi/.nvm/versions/node/v22.x.x/bin/node /home/pi/.openclaw/bin/openclaw gateway run
Restart=always
RestartSec=10
StandardOutput=journal
StandardError=journal
SyslogIdentifier=openclaw-gateway

# Resource limits (optimized for Raspberry Pi)
MemoryMax=1G
CPUQuota=80%

# Security hardening
NoNewPrivileges=true
ProtectSystem=strict
ProtectHome=read-only
ReadWritePaths=/home/pi/.openclaw /home/pi/.config/openclaw

[Install]
WantedBy=multi-user.targetImportant: Replace the Node.js path in ExecStart with your actual installation path. Use which node to find the exact location. If using nvm, the path is typically /home/pi/.nvm/versions/node/v22.x.x/bin/node.
5.2 Enable and Manage the Service
# Reload systemd configuration
sudo systemctl daemon-reload

# Enable auto-start on boot
sudo systemctl enable openclaw-gateway

# Start the service immediately
sudo systemctl start openclaw-gateway

# Check service status
sudo systemctl status openclaw-gateway

# View real-time logs
sudo journalctl -u openclaw-gateway -f

# View the last 100 log lines
sudo journalctl -u openclaw-gateway -n 100 --no-pager
5.3 Deploy the Node Service Alongside
The Gateway handles scheduling while the Node handles execution. In most Raspberry Pi scenarios, both Gateway and Node run on the same machine:
# Create the Node systemd service
sudo nano /etc/systemd/system/openclaw-node.service
[Unit]
Description=OpenClaw Node Service
After=openclaw-gateway.service
Requires=openclaw-gateway.service
[Service]
Type=simple
User=pi
Group=pi
WorkingDirectory=/home/pi
Environment=NODE_ENV=production
ExecStart=/home/pi/.nvm/versions/node/v22.x.x/bin/node /home/pi/.openclaw/bin/openclaw node start
Restart=always
RestartSec=15
StandardOutput=journal
StandardError=journal
SyslogIdentifier=openclaw-node
MemoryMax=2G
CPUQuota=90%
NoNewPrivileges=true
[Install]
WantedBy=multi-user.target# Enable and start the Node service
sudo systemctl daemon-reload
sudo systemctl enable openclaw-node
sudo systemctl start openclaw-nodeNote that After= and Requires= ensure the Node service starts after the Gateway, and if the Gateway stops, the Node will also stop.
6. Step 4: Remote Access Configuration
Raspberry Pis are typically deployed at remote sites — factory floors, server rooms, greenhouses, retail stores. You need to securely access these devices from your office or home.[9]
6.1 Tailscale Zero-Configuration VPN (Recommended)
Tailscale is the ideal remote access solution for Raspberry Pi — no need to set up port forwarding, dynamic DNS, or public IPs. Simply install the Tailscale client on each device, and they can communicate directly through WireGuard encrypted tunnels.[9]
# Install Tailscale on the Raspberry Pi
curl -fsSL https://tailscale.com/install.sh | sh

# Start and authenticate
sudo tailscale up

# It will output an authentication URL — open it in a browser and log into your Tailscale account

# Check the assigned Tailscale IP
tailscale ip -4
# Example output: 100.64.0.5
Once installed, you can SSH directly to the Raspberry Pi from any device with Tailscale installed using the Tailscale IP:
# SSH from your laptop (also with Tailscale installed)
ssh [email protected]

# Or directly access the Gateway
openclaw gateway status --host 100.64.0.5
6.2 SSH Tunnel (Alternative)
If you prefer not to use a third-party VPN, SSH Tunnel is the most traditional approach. The prerequisite is having a jump host with a public IP:
# Create a reverse SSH tunnel on the Raspberry Pi
ssh -R 18789:localhost:18789 -N -f [email protected]

# Access the Gateway from your laptop through the jump host
ssh -L 18789:localhost:18789 [email protected]
To make the SSH Tunnel persistent, use autossh:
# Install autossh
sudo apt install -y autossh

# Create an auto-reconnecting reverse tunnel with autossh
autossh -M 0 -o "ServerAliveInterval 30" -o "ServerAliveCountMax 3" \
  -R 18789:localhost:18789 -N -f [email protected]
6.3 Enable Remote Mode and Token Authentication
If you need other devices to connect directly to the Raspberry Pi's Gateway (e.g., when multiple Pis form a cluster), you need to switch the Gateway to Remote mode:[8]
# Switch to Remote mode
openclaw config set gateway.mode remote

# Set the Gateway Token (strongly recommended to use a randomly generated long string)
openclaw config set gateway.token $(openssl rand -hex 32)

# View the configured Token
openclaw config get gateway.token

# Restart the Gateway for settings to take effect
sudo systemctl restart openclaw-gateway
Security warning: Enabling Remote mode means the Gateway will listen on all network interfaces. Make sure the Token is sufficiently complex, and combine it with Tailscale or firewall rules to restrict source IPs. Never expose the Gateway to the public internet without authentication.[8]
7. IoT Sensor Integration Scenarios
This is the most unique value of deploying OpenClaw on a Raspberry Pi — connecting the AI agent's decision-making capabilities with physical world sensors. Below are three practical IoT integration scenarios.[10]
7.1 Temperature and Humidity Monitoring
Use a DHT22 sensor connected to the Raspberry Pi via GPIO, reading temperature and humidity data every 5 minutes, and let the OpenClaw agent determine whether an alert needs to be sent:
# Install the Python library for reading DHT22
pip3 install adafruit-circuitpython-dht

# Create sensor reading script: /home/pi/scripts/read_sensor.py
import adafruit_dht
import board
import json

dht = adafruit_dht.DHT22(board.D4)

data = {
    "temperature_c": dht.temperature,
    "humidity_pct": dht.humidity,
    "timestamp": __import__('datetime').datetime.now().isoformat()
}

print(json.dumps(data))
Then create a Skill script in OpenClaw so the agent can call this sensor:
# Skill definition in the OpenClaw Workspace
# ~/.openclaw/workspaces/iot-monitor/skills/read-temperature.sh
#!/bin/bash
python3 /home/pi/scripts/read_sensor.py
When the agent receives a command like "Check the current temperature and humidity, and notify me via Telegram if the temperature exceeds 30 degrees Celsius," it will execute the sensor reading script, parse the JSON output, evaluate the temperature threshold, and send an alert through the Telegram Channel.
7.2 Access Control System Integration
Control an electromagnetic lock through a relay module, combined with an RFID reader or facial recognition camera:
# Script to control GPIO relay: /home/pi/scripts/door_control.sh
#!/bin/bash
# Unlock door: set GPIO 17 high for 3 seconds then restore
gpio -g mode 17 out
gpio -g write 17 1
sleep 3
gpio -g write 17 0
echo "Door unlocked for 3 seconds"
The OpenClaw agent can execute access control based on Telegram messages or schedules: upon receiving an "Open the back door" command, it verifies the sender's identity, executes the unlock script, and logs the event.
7.3 Camera Monitoring and Snapshot Analysis
The Raspberry Pi's CSI camera module or USB camera can work with OpenClaw for scheduled snapshots and analysis:
# Camera snapshot script: /home/pi/scripts/capture.sh
#!/bin/bash
TIMESTAMP=$(date +%Y%m%d_%H%M%S)
libcamera-still -o /home/pi/captures/snapshot_${TIMESTAMP}.jpg \
  --width 1920 --height 1080 --nopreview
echo "/home/pi/captures/snapshot_${TIMESTAMP}.jpg"
Combined with OpenClaw's multimodal capabilities (when using an LLM that supports image analysis), the agent can take periodic photos and analyze image content — for example, determining whether a parking lot has available spaces, assessing crop growth conditions on a farm, or checking retail shelf inventory levels.
8. Cron Scheduling Automation
OpenClaw's built-in Cron scheduling feature is the core driver for IoT scenarios. Through scheduling, the agent can automatically perform sensor readings, data analysis, report generation, and other tasks at specified times.[6]
8.1 Configure OpenClaw Cron Jobs
# Add a sensor monitoring schedule that runs every 5 minutes
openclaw cron add \
  --name "temperature-monitor" \
  --schedule "*/5 * * * *" \
  --prompt "Read the temperature and humidity sensor data. If the temperature exceeds 30 degrees Celsius or humidity exceeds 80%, send an alert notification via Telegram, including the current values and timestamp"

# Add a daily environment report at 08:00
openclaw cron add \
  --name "daily-environment-report" \
  --schedule "0 8 * * *" \
  --prompt "Compile the temperature and humidity data from the past 24 hours, generate a summary report including maximum, minimum, and average values, and send it to me via Telegram"

# Add an hourly camera patrol
openclaw cron add \
  --name "camera-patrol" \
  --schedule "0 * * * *" \
  --prompt "Take a camera snapshot, analyze the image for any anomalies (such as foreign objects or unauthorized personnel), and send an immediate alert if anomalies are detected"

# List all schedules
openclaw cron list

# Remove a schedule
openclaw cron rm TASK_ID
8.2 Combining Schedules with systemd Timers
For scenarios requiring finer-grained control (such as triggers based on system events rather than fixed times), you can combine with systemd Timers:
# Create a systemd timer to run system diagnostics 2 minutes after boot
# /etc/systemd/system/openclaw-bootcheck.timer
[Unit]
Description=OpenClaw Boot Health Check

[Timer]
OnBootSec=120
Unit=openclaw-bootcheck.service

[Install]
WantedBy=timers.target
# Corresponding service
# /etc/systemd/system/openclaw-bootcheck.service
[Unit]
Description=OpenClaw Boot Health Check
[Service]
Type=oneshot
User=pi
ExecStart=/home/pi/.nvm/versions/node/v22.x.x/bin/node \
/home/pi/.openclaw/bin/openclaw agent \
--message "Check system health status: CPU temperature, memory usage, disk space. Send an alert via Telegram if any anomalies are found"9. Performance Tuning and Memory Management
The Raspberry Pi's 4-8GB of RAM is relatively limited compared to desktop computers or cloud VPS instances. Proper performance tuning can significantly improve stability.
9.1 Swap Space Configuration
Raspberry Pi OS defaults to only 200MB of Swap, which is insufficient for running both the OpenClaw Gateway and Node simultaneously:
# Check current Swap size
free -h

# Increase Swap to 2GB
sudo dphys-swapfile swapoff
sudo sed -i 's/CONF_SWAPSIZE=.*/CONF_SWAPSIZE=2048/' /etc/dphys-swapfile
sudo dphys-swapfile setup
sudo dphys-swapfile swapon

# Verify
free -h
# Swap: 2.0GiNote: If using a microSD card for storage, frequent Swap read/write operations will accelerate SD card wear. Recommendations: (1) Keep memory usage below 80% of physical RAM, using Swap only as a safety net; (2) If Swap is frequently used, switch to a USB SSD or NVMe SSD.
9.2 Node.js Memory Limits
# Limit Node.js maximum heap memory in the systemd service
# Edit /etc/systemd/system/openclaw-gateway.service
# Add before ExecStart:
Environment=NODE_OPTIONS=--max-old-space-size=512

# For the Node service, you can allocate more memory
# In openclaw-node.service:
Environment=NODE_OPTIONS=--max-old-space-size=1024
9.3 Model Strategy: Choose Lightweight Models
Most IoT tasks don't require the strongest reasoning capability. Sensible model selection can save both API costs and response time simultaneously:
| Task Type | Recommended Model | Estimated Cost per Call | Typical Latency |
|---|---|---|---|
| Sensor data interpretation | Claude 3.5 Haiku / GPT-4o-mini | < $0.001 | 0.5-1s |
| Alert evaluation and notification | Claude 3.5 Haiku / GPT-4o-mini | < $0.001 | 0.5-1s |
| Daily report generation | Claude 3.5 Sonnet / GPT-4o | $0.005-0.02 | 2-5s |
| Image analysis | Claude 3.5 Sonnet / GPT-4o | $0.01-0.05 | 3-8s |
| Complex decision reasoning | Claude 3.5 Opus / o1 | $0.05-0.15 | 10-30s |
# Set the default to a lightweight model
openclaw config set llm.defaultModel "claude-3-5-haiku"

# Set a different model for a specific Workspace
openclaw config set llm.defaultModel "claude-3-5-sonnet" \
  --workspace daily-report
10. Low-Power Operation Strategies
In battery-powered or solar-powered edge scenarios (such as outdoor agricultural monitoring stations), further reducing power consumption is critical.
10.1 CPU Frequency Adjustment
# Check current CPU frequency
cat /sys/devices/system/cpu/cpu0/cpufreq/scaling_cur_freq

# Switch to power-saving mode (reduced frequency)
echo "powersave" | sudo tee /sys/devices/system/cpu/cpu*/cpufreq/scaling_governor

# Switch back to performance mode (when processing tasks)
echo "ondemand" | sudo tee /sys/devices/system/cpu/cpu*/cpufreq/scaling_governor

# Set maximum frequency limit (e.g., limit to 1.5 GHz)
echo 1500000 | sudo tee /sys/devices/system/cpu/cpu*/cpufreq/scaling_max_freq
10.2 Disable Unused Interfaces
# Disable HDMI (saves approximately 0.2W)
sudo tvservice -o
# Or add to /boot/firmware/config.txt:
# dtoverlay=vc4-kms-v3d,nohdmi

# Disable Bluetooth (saves approximately 0.1W)
sudo systemctl disable bluetooth
sudo systemctl stop bluetooth

# Disable Wi-Fi (if using Ethernet)
sudo rfkill block wifi

# Disable USB (if no USB devices are connected — use with caution)
# echo '1-1' | sudo tee /sys/bus/usb/drivers/usb/unbind
10.3 Intermittent Operation Mode
For scenarios that don't require 24/7 continuous monitoring, you can have the Raspberry Pi wake up at scheduled times, execute tasks, and then re-enter a low-power state:
# Use rtcwake to set the Raspberry Pi to automatically wake up in 30 minutes
sudo rtcwake -m mem -s 1800

# Combined with crontab to automatically execute OpenClaw tasks after waking up
# /etc/cron.d/openclaw-wakeup
@reboot pi sleep 30 && /home/pi/.openclaw/bin/openclaw agent \
  --message "Read all sensors, generate a report, and send notifications" && \
  sudo rtcwake -m mem -s 1800
In this mode, average power consumption can drop below 0.5W, making solar or large-capacity portable battery power feasible.
11. Multi-Pi Cluster Architecture
When a single location's monitoring needs exceed the processing capacity of one Raspberry Pi, or when you need to deploy sensor nodes across multiple geographic locations, you can build an OpenClaw cluster architecture.[3]
11.1 Architecture Design
OpenClaw's separated Gateway + Node architecture naturally supports cluster deployment:
- Central Gateway: A Pi 5 (8GB) serves as the Gateway host, responsible for task scheduling, LLM request routing, and state management
- Edge Nodes: Multiple Pi 4s or Pi Zero 2 Ws serve as Nodes, distributed across different zones, each connected to local sensors
- Communication layer: All Nodes connect to the central Gateway via Tailscale VPN or local area network
# On an edge Node (Pi 4), configure connection to the central Gateway
openclaw config set gateway.mode remote
openclaw config set gateway.host 100.64.0.5  # Gateway's Tailscale IP
openclaw config set gateway.port 18789
openclaw config set gateway.token YOUR_GATEWAY_TOKEN

# Start the Node (it will automatically connect to the remote Gateway)
openclaw node start
11.2 Naming and Label Management
As the cluster grows, clear naming and labeling become key to management:
# Set a meaningful name for each Node
openclaw config set node.name "factory-floor-A"
openclaw config set node.tags "location:factory,zone:A,sensors:temperature,humidity"

# On another Node
openclaw config set node.name "warehouse-entrance"
openclaw config set node.tags "location:warehouse,zone:entrance,sensors:camera,rfid"

# View all connected Nodes from the Gateway
openclaw gateway nodes list
# factory-floor-A    [online]  sensors: temperature, humidity
# warehouse-entrance  [online]  sensors: camera, rfid
# greenhouse-01       [offline] last seen: 2 hours ago
11.3 Zone Routing
In Cron schedules or manual commands, you can specify a particular Node to execute tasks:
# Assign a task to a specific Node
openclaw agent --message "Read the temperature sensor and determine if it exceeds the safety threshold"

# Specify a Node in a Cron schedule
openclaw cron add \
  --name "warehouse-patrol" \
  --schedule "0 */2 * * *" \
  --node "warehouse-entrance" \
  --prompt "Take a camera snapshot and confirm no anomalies at the entrance"
12. Troubleshooting
Below are the most commonly encountered issues and solutions when deploying OpenClaw on Raspberry Pi:
12.1 Installation Failure: "Unsupported architecture"
# Confirm you are using a 64-bit OS
uname -m
# Expected output: aarch64

# If the output is armv7l, you are using a 32-bit OS
# Solution: Use Raspberry Pi Imager to re-flash the 64-bit version
12.2 Gateway Crashes Immediately After Startup
# View crash logs
sudo journalctl -u openclaw-gateway -n 50 --no-pager

# Common cause 1: Insufficient memory
free -h
# Solution: Increase Swap or reduce Node.js heap memory limit

# Common cause 2: Port already in use
sudo lsof -i :18789
# Solution: Stop the process occupying the port, or change the Gateway port
openclaw config set gateway.port 18790

# Common cause 3: Node.js version too old
node -v
# Solution: Upgrade to 20.x or above
12.3 Node Cannot Connect to Remote Gateway
# Test network connectivity
ping 100.64.0.5  # Gateway's IP

# Test whether the Gateway port is reachable
nc -zv 100.64.0.5 18789

# Check if the Token is correct
openclaw config get gateway.token

# View connection logs on the Gateway side
sudo journalctl -u openclaw-gateway | grep "connection"
12.4 SD Card Running Out of Space
# Check disk usage
df -h

# Clean APT cache
sudo apt clean
sudo apt autoremove -y

# Clean OpenClaw logs and temporary files
openclaw reset --logs

# Set journald log size limit
sudo sed -i 's/#SystemMaxUse=/SystemMaxUse=100M/' /etc/systemd/journald.conf
sudo systemctl restart systemd-journald
12.5 CPU Overheating Causing Throttling
# Check CPU temperature
vcgencmd measure_temp
# Expected: temp=45.0'C (normal)
# Warning: temp=80.0'C or above indicates insufficient cooling

# Check for throttling events
vcgencmd get_throttled
# 0x0 = Normal
# 0x80008 = Previously throttled due to overheating

# Solutions:
# 1. Install an active cooler (fan)
# 2. Reduce maximum CPU frequency
# 3. Ensure the case has sufficient ventilation
12.6 Unstable Wi-Fi Connection
# Check Wi-Fi signal strength
iwconfig wlan0 | grep "Signal level"

# Solutions in priority order:
# 1. Switch to wired Ethernet connection (most stable)
# 2. Use a USB Wi-Fi antenna to boost signal
# 3. Configure Wi-Fi auto-reconnect
sudo crontab -e
# Add:
# */5 * * * * /usr/bin/ping -c 1 8.8.8.8 > /dev/null 2>&1 || sudo ifconfig wlan0 down && sudo ifconfig wlan0 up
13. Conclusion: The Infinite Possibilities of Edge AI Agents
Deploying OpenClaw on a Raspberry Pi is more than just an interesting technical experiment — it represents an entirely new AI application paradigm: bringing AI agents out of the cloud and into the physical world.[7]
Let's review the complete path covered in this guide:
- Hardware selection: Pi 5 as the top choice, Pi 4 as a budget alternative, Pi Zero 2 W as a lightweight sensor node
- System deployment: 64-bit Lite OS + Node.js 22.x + OpenClaw one-line installation
- Headless operation:
systemdservices for Gateway + Node auto-start on boot and automatic restart on failure - Remote access: Tailscale zero-configuration VPN or SSH Tunnel for secure remote management
- IoT integration: Practical architectures for temperature/humidity monitoring, access control, and camera analysis
- Automation: Cron scheduling-driven 24/7 unattended workflows
- Performance optimization: Three-dimensional tuning of Swap configuration, memory limits, and model strategy
- Low-power strategies: Energy optimization through CPU frequency reduction, interface disabling, and intermittent operation
- Cluster scaling: Architecture design for distributed Node clusters across multiple Pis
An US$80 Raspberry Pi, combined with OpenClaw's Gateway architecture, can become a smart monitoring center for factory floors, an environmental manager for agricultural greenhouses, an inventory inspector for retail stores, or a home automation butler. When edge computing meets AI agents, the limitation is no longer hardware specifications but your imagination.[3]
If you're considering edge deployment of OpenClaw, we recommend starting with a Pi 5 + a single sensor (such as the DHT22 temperature/humidity sensor), first getting the complete data collection -> LLM decision -> alert notification loop working, then gradually expanding to more complex multi-sensor, multi-node architectures. The best learning path for technology always starts with the minimum viable implementation.
For more OpenClaw deployment and configuration guides, refer to our Complete OpenClaw Configuration Guide and Troubleshooting Handbook. If you have specific IoT integration needs or enterprise deployment plans, feel free to contact our technical consulting team.