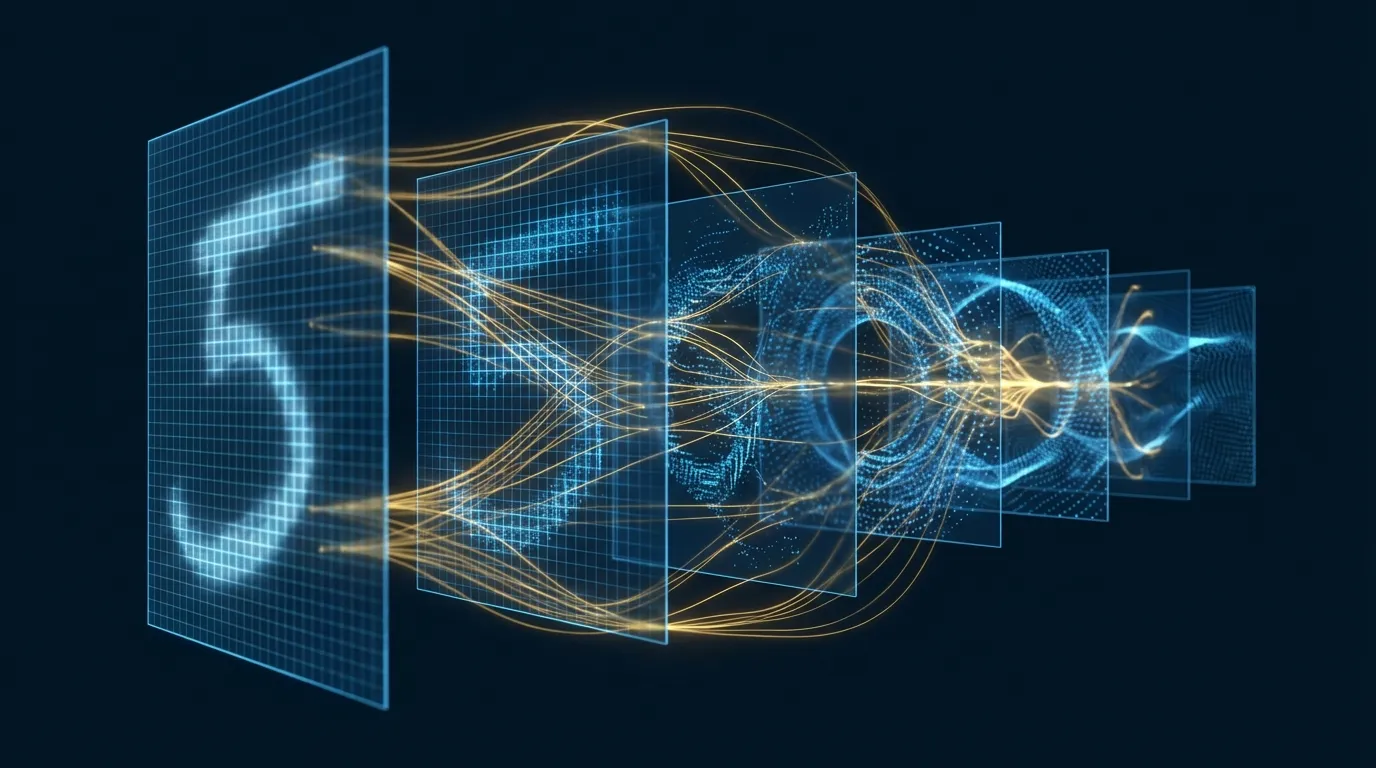
一、從注意力到自注意力:一場範式革命
2017 年,Google 團隊在一篇名為「Attention Is All You Need」的論文[1]中提出了一個看似大膽的主張:完全拋棄循環與卷積,僅靠注意力機制就能建構最強大的序列模型。這篇論文催生的 Transformer 架構,在短短數年內徹底重塑了整個人工智慧領域。
在 Transformer 之前,注意力機制已在 Bahdanau 等人的研究[2]中嶄露頭角——作為 RNN 的輔助模組,幫助解碼器「關注」編碼器輸出中最相關的部分。但 Vaswani 等人走得更遠:他們讓序列中的每個元素都能直接與所有其他元素互動,不需要 RNN 的逐步傳遞。這就是自注意力(Self-Attention)的精髓。
這個轉變的意義在於:
| 特性 | RNN | Self-Attention |
|---|---|---|
| 長距離依賴 | O(n) 步才能連接首尾 | O(1) 直接連接任意位置 |
| 平行化 | 必須逐步計算,無法平行 | 所有位置同時計算 |
| 計算複雜度 | O(n · d²) 逐步 | O(n² · d) 全域 |
| 記憶瓶頸 | 固定大小的隱藏狀態 | 動態注意力權重矩陣 |
二、Scaled Dot-Product Attention:數學核心
自注意力的計算可以濃縮為三個矩陣運算:Query(查詢)、Key(鍵)、Value(值)。每個輸入 token 被投影成三個向量,然後透過點積計算彼此的「相關程度」。
Attention(Q, K, V) = softmax(Q · K^T / √d_k) · V

其中:
  Q = X · W_Q    (Query 矩陣, 形狀 [n, d_k])
  K = X · W_K    (Key 矩陣, 形狀 [n, d_k])
  V = X · W_V    (Value 矩陣, 形狀 [n, d_v])
  d_k = Key 向量的維度
  √d_k = 縮放因子,防止點積過大導致 softmax 飽和
直觀理解:
- Q · K^T:計算每對 token 之間的「相似度分數」——一個 n×n 的注意力矩陣
- / √d_k:縮放因子。當 d_k 很大時,點積的方差也很大,softmax 會產生極端的 0/1 分布(梯度消失)。除以 √d_k 將方差穩定在 1[1]
- softmax:將分數轉換為機率分布,代表每個 token「應該關注其他 token 多少」
- · V:以注意力權重加權求和 Value 向量,產生上下文感知的新表示
舉例:在句子「The cat sat on the mat because it was tired」中,「it」的 Query 向量會與所有其他 token 的 Key 向量做點積。理想情況下,「cat」的 Key 會與「it」的 Query 產生最高分數,因此模型能正確地將「it」解析為指代「cat」。
三、多頭注意力:平行的多視角觀察
一組 Q、K、V 只能捕捉一種類型的關係。但語言中的關係是多面向的——語法依賴、語義相似、指代關係、時態一致性……Transformer 的解決方案是多頭注意力(Multi-Head Attention):
MultiHead(Q, K, V) = Concat(head_1, ..., head_h) · W_O

其中 head_i = Attention(Q · W_Q^i, K · W_K^i, V · W_V^i)

以 d_model=512, h=8 為例:
  每個頭的 d_k = d_v = 512 / 8 = 64
  8 個頭各自獨立做 64 維的注意力
  串接後投影回 512 維
Voita 等人的研究[12]發現,不同的注意力頭確實會學到不同的「角色」:有的專注位置關係、有的追蹤語法結構、有的處理罕見詞。有趣的是,Michel 等人[17]發現大量頭可以被修剪而幾乎不影響效能——暗示多頭機制提供了一種有益的冗餘和正則化。
四、位置編碼:讓注意力理解「順序」
自注意力本身是置換不變的——打亂輸入順序,輸出也跟著打亂,但每個 token 的表示不會改變。這意味著「狗咬人」和「人咬狗」在純自注意力看來完全相同。因此,Transformer 需要額外的位置編碼(Positional Encoding)來注入順序資訊。
原始 Transformer 使用正弦波位置編碼[1]:
PE(pos, 2i)   = sin(pos / 10000^(2i/d_model))
PE(pos, 2i+1) = cos(pos / 10000^(2i/d_model))

其中 pos 是 token 位置,i 是維度索引
近年來,位置編碼經歷了重大演進:
| 方法 | 核心思想 | 優勢 | 代表模型 |
|---|---|---|---|
| 正弦波[1] | 固定的三角函數 | 無需訓練 | 原始 Transformer |
| 可學習 | 每個位置一個可訓練向量 | 自適應 | BERT, GPT |
| RoPE[13] | 旋轉矩陣編碼相對位置 | 長度外推、相對感知 | LLaMA, PaLM |
| ALiBi[14] | 注意力分數加線性距離偏置 | 零參數、強外推 | BLOOM, MPT |
RoPE[13] 已成為當前主流大型語言模型的標準選擇。它將位置資訊編碼為向量空間中的旋轉——兩個 token 的注意力分數只取決於它們的相對距離,且具有良好的長度外推能力。
五、Transformer 架構全景
完整的 Transformer 由 Encoder 和 Decoder 兩部分組成,但不同應用會選用不同的組合:
| 架構類型 | 結構 | 代表模型 | 典型任務 |
|---|---|---|---|
| Encoder-only | 雙向自注意力 | BERT[3] | 分類、NER、問答 |
| Decoder-only | 因果遮罩自注意力 | GPT[4][5] | 文字生成、對話 |
| Encoder-Decoder | 編碼器+交叉注意力+解碼器 | T5, BART | 翻譯、摘要 |
每個 Transformer 層(block)包含兩個子層,每個子層都有殘差連接和層歸一化:
Transformer Block:
  1. Multi-Head Self-Attention
     → LayerNorm(x + MultiHead(x, x, x))
  2. Feed-Forward Network (FFN)
     → LayerNorm(x + FFN(x))
     → FFN(x) = max(0, x·W_1 + b_1) · W_2 + b_2

Decoder 額外包含:
  - Causal Mask:遮蔽未來位置,確保自迴歸生成
  - Cross-Attention:Query 來自解碼器,Key/Value 來自編碼器
六、BERT 與 GPT:兩條路線的分岔
Transformer 架構催生了兩大預訓練範式,它們的差異在於自注意力的「可見範圍」:
BERT(Bidirectional)[3]:使用 Encoder 架構,每個 token 可以看到序列中的所有其他 token(包括前後文)。以遮蔽語言模型(MLM)預訓練——隨機遮蔽 15% 的 token,讓模型預測被遮蔽的詞。這種雙向上下文讓 BERT 特別擅長理解型任務。
GPT(Autoregressive)[4]:使用 Decoder 架構,每個 token 只能看到它之前的 token(因果遮罩)。以下一個 token 預測(Next Token Prediction)預訓練。GPT-3[5] 將參數擴展到 1750 億,展示了驚人的 few-shot 學習能力——不需要微調,僅靠 prompt 就能執行翻譯、問答、程式碼生成等多種任務。
隨著規模擴展,Kaplan 等人[15]發現了著名的Scaling Laws——模型性能(loss)與參數量、資料量、計算量之間存在穩定的冪律關係。更令人驚訝的是,Wei 等人[16]記錄了湧現能力(Emergent Abilities)現象:某些能力(如思維鏈推理)在小模型中完全不存在,但在模型達到特定規模門檻時突然出現。
七、Vision Transformer:自注意力征服視覺
長期以來,電腦視覺被 卷積神經網路 統治。2021 年,Dosovitskiy 等人[6]提出了 Vision Transformer(ViT),證明純自注意力架構在大規模資料上可以匹敵甚至超越最強的 CNN。
ViT 的核心思想極為優雅:
ViT 流程:
1. 將 224×224 影像分割為 16×16 的 patch → 196 個 patch
2. 每個 patch 展平為 768 維向量(16×16×3 = 768)
3. 加上可學習的位置編碼 + [CLS] token
4. 送入標準 Transformer Encoder
5. 取 [CLS] token 的輸出做分類

「一張影像就是 16×16 的字」——將影像 patch 視為序列中的 token
ViT 的成功引發了視覺 Transformer 的爆發。Swin Transformer[7] 以滑動視窗策略將注意力的複雜度從 O(n²) 降至 O(n),成為通用的視覺骨幹。DETR[8] 則以 Transformer 實現端到端物件偵測,消除了傳統的 anchor box 和 NMS 後處理。
八、效率突破:讓自注意力突破 O(n²)
自注意力的 O(n²) 時間和記憶體複雜度是其最大瓶頸。對於長度為 n 的序列,注意力矩陣需要 n² 的計算量和儲存空間。當 n = 100,000 時,這意味著 10^10 次運算——這在工程上是不可接受的。
學界和業界提出了多種突破策略:
| 方法 | 核心策略 | 複雜度 | 精確度 |
|---|---|---|---|
| Linformer[9] | Key/Value 低秩投影 | O(n) | 近似 |
| Performer[10] | 隨機特徵映射(FAVOR+) | O(n) | 近似 |
| FlashAttention[11] | IO 感知分塊 + 核融合 | O(n²) 但 2-4x 快 | 精確 |
| Sliding Window | 僅關注局部視窗 | O(n · w) | 局部精確 |
| Sparse Attention | 稀疏注意力模式 | O(n√n) | 近似 |
FlashAttention[11] 的貢獻尤其重要:它不改變數學——計算結果與標準注意力完全相同——而是透過精巧的 GPU 記憶體管理(分塊計算、避免 HBM ↔ SRAM 往返)實現 2-4 倍加速。它已成為現代 LLM 訓練的標準組件。
九、Hands-on Lab 1:從零實現 Transformer 文本分類器(Google Colab)
以下實驗自行實現多頭自注意力層,構建一個迷你 Transformer 進行 IMDb 電影評論情感分類,並視覺化注意力權重。
# ============================================================
# Lab 1: 從零實現 Transformer — IMDb 情感分類 + 注意力視覺化
# 環境: Google Colab (GPU)
# ============================================================
# --- 0. 安裝 ---
!pip install -q torchtext datasets

import torch
import torch.nn as nn
import torch.nn.functional as F
import math
import numpy as np
import matplotlib.pyplot as plt
from datasets import load_dataset
from torch.utils.data import DataLoader
from collections import Counter

device = torch.device('cuda' if torch.cuda.is_available() else 'cpu')
print(f"Device: {device}")

# --- 1. 資料準備 ---
dataset = load_dataset("imdb")
train_data = dataset["train"].shuffle(seed=42).select(range(10000))
test_data = dataset["test"].shuffle(seed=42).select(range(2000))

# 簡易 tokenizer
def simple_tokenizer(text):
    return text.lower().split()

# 建立詞彙表
counter = Counter()
for example in train_data:
    counter.update(simple_tokenizer(example["text"]))
vocab = {"<pad>": 0, "<unk>": 1}
for word, count in counter.most_common(20000):
    if count >= 3:
        vocab[word] = len(vocab)
vocab_size = len(vocab)
print(f"Vocab size: {vocab_size}")

MAX_LEN = 256

def encode(text):
    tokens = simple_tokenizer(text)[:MAX_LEN]
    ids = [vocab.get(t, 1) for t in tokens]
    return ids

def collate_fn(batch):
    texts = [encode(ex["text"]) for ex in batch]
    labels = torch.tensor([ex["label"] for ex in batch])
    max_len = min(max(len(t) for t in texts), MAX_LEN)
    padded = torch.zeros(len(texts), max_len, dtype=torch.long)
    for i, t in enumerate(texts):
        padded[i, :len(t)] = torch.tensor(t)
    return padded, labels

train_loader = DataLoader(train_data, batch_size=32, shuffle=True, collate_fn=collate_fn)
test_loader = DataLoader(test_data, batch_size=64, shuffle=False, collate_fn=collate_fn)

# --- 2. 自行實現多頭自注意力 ---
class MultiHeadSelfAttention(nn.Module):
    def __init__(self, d_model, n_heads):
        super().__init__()
        assert d_model % n_heads == 0
        self.d_model = d_model
        self.n_heads = n_heads
        self.d_k = d_model // n_heads

        self.W_Q = nn.Linear(d_model, d_model)
        self.W_K = nn.Linear(d_model, d_model)
        self.W_V = nn.Linear(d_model, d_model)
        self.W_O = nn.Linear(d_model, d_model)
        self.attn_weights = None  # 儲存注意力權重供視覺化

    def forward(self, x, mask=None):
        B, N, _ = x.shape

        # 投影 + 分頭: [B, N, d_model] → [B, h, N, d_k]
        Q = self.W_Q(x).view(B, N, self.n_heads, self.d_k).transpose(1, 2)
        K = self.W_K(x).view(B, N, self.n_heads, self.d_k).transpose(1, 2)
        V = self.W_V(x).view(B, N, self.n_heads, self.d_k).transpose(1, 2)

        # Scaled Dot-Product Attention
        scores = torch.matmul(Q, K.transpose(-2, -1)) / math.sqrt(self.d_k)
        if mask is not None:
            scores = scores.masked_fill(mask == 0, float('-inf'))
        attn = F.softmax(scores, dim=-1)
        self.attn_weights = attn.detach()

        out = torch.matmul(attn, V)  # [B, h, N, d_k]
        out = out.transpose(1, 2).contiguous().view(B, N, self.d_model)
        return self.W_O(out)

# --- 3. Transformer Encoder Block ---
class TransformerBlock(nn.Module):
    def __init__(self, d_model, n_heads, d_ff, dropout=0.1):
        super().__init__()
        self.attn = MultiHeadSelfAttention(d_model, n_heads)
        self.norm1 = nn.LayerNorm(d_model)
        self.norm2 = nn.LayerNorm(d_model)
        self.ffn = nn.Sequential(
            nn.Linear(d_model, d_ff),
            nn.GELU(),
            nn.Dropout(dropout),
            nn.Linear(d_ff, d_model),
            nn.Dropout(dropout),
        )
        self.dropout = nn.Dropout(dropout)

    def forward(self, x, mask=None):
        x = self.norm1(x + self.dropout(self.attn(x, mask)))
        x = self.norm2(x + self.ffn(x))
        return x

# --- 4. 完整分類模型 ---
class TransformerClassifier(nn.Module):
    def __init__(self, vocab_size, d_model=128, n_heads=4,
                 n_layers=3, d_ff=256, max_len=256, n_classes=2, dropout=0.1):
        super().__init__()
        self.embedding = nn.Embedding(vocab_size, d_model, padding_idx=0)
        self.pos_encoding = nn.Embedding(max_len, d_model)
        self.blocks = nn.ModuleList([
            TransformerBlock(d_model, n_heads, d_ff, dropout)
            for _ in range(n_layers)
        ])
        self.classifier = nn.Linear(d_model, n_classes)
        self.dropout = nn.Dropout(dropout)

    def forward(self, x):
        B, N = x.shape
        positions = torch.arange(N, device=x.device).unsqueeze(0).expand(B, N)
        mask = (x != 0).unsqueeze(1).unsqueeze(2)  # [B, 1, 1, N]

        x = self.dropout(self.embedding(x) + self.pos_encoding(positions))
        for block in self.blocks:
            x = block(x, mask)

        # 全域平均池化(忽略 padding)
        mask_float = (x != 0).any(dim=-1, keepdim=True).float()
        x = (x * mask_float).sum(dim=1) / mask_float.sum(dim=1).clamp(min=1)
        return self.classifier(x)

# --- 5. 訓練 ---
model = TransformerClassifier(vocab_size).to(device)
optimizer = torch.optim.AdamW(model.parameters(), lr=3e-4, weight_decay=0.01)
criterion = nn.CrossEntropyLoss()

print(f"Parameters: {sum(p.numel() for p in model.parameters()):,}")

for epoch in range(6):
    model.train()
    total_loss, correct, total = 0, 0, 0
    for xb, yb in train_loader:
        xb, yb = xb.to(device), yb.to(device)
        logits = model(xb)
        loss = criterion(logits, yb)
        optimizer.zero_grad()
        loss.backward()
        nn.utils.clip_grad_norm_(model.parameters(), 1.0)
        optimizer.step()
        total_loss += loss.item() * xb.size(0)
        correct += (logits.argmax(1) == yb).sum().item()
        total += xb.size(0)
    print(f"Epoch {epoch+1}: loss={total_loss/total:.4f}, acc={correct/total:.4f}")

# --- 6. 測試 ---
model.eval()
correct, total = 0, 0
with torch.no_grad():
    for xb, yb in test_loader:
        xb, yb = xb.to(device), yb.to(device)
        logits = model(xb)
        correct += (logits.argmax(1) == yb).sum().item()
        total += xb.size(0)
print(f"\nTest Accuracy: {correct/total:.4f}")

# --- 7. 注意力視覺化 ---
def visualize_attention(text, model):
    model.eval()
    tokens = simple_tokenizer(text)[:50]
    ids = torch.tensor([[vocab.get(t, 1) for t in tokens]]).to(device)

    with torch.no_grad():
        _ = model(ids)

    # 取最後一層的注意力權重
    attn = model.blocks[-1].attn.attn_weights[0]  # [h, N, N]

    fig, axes = plt.subplots(1, 4, figsize=(20, 5))
    for i in range(4):
        ax = axes[i]
        im = ax.imshow(attn[i, :len(tokens), :len(tokens)].cpu(),
                       cmap='Blues', aspect='auto')
        ax.set_xticks(range(len(tokens)))
        ax.set_yticks(range(len(tokens)))
        ax.set_xticklabels(tokens, rotation=90, fontsize=7)
        ax.set_yticklabels(tokens, fontsize=7)
        ax.set_title(f'Head {i+1}')
        plt.colorbar(im, ax=ax, fraction=0.046)
    plt.suptitle('Multi-Head Self-Attention Weights (Last Layer)', fontsize=14)
    plt.tight_layout()
    plt.show()

# 視覺化範例
visualize_attention("this movie was absolutely wonderful and the acting was superb", model)
visualize_attention("terrible film with awful dialogue and boring plot", model)
print("Lab 1 Complete!")
十、Hands-on Lab 2:Vision Transformer 影像分類 + 注意力熱圖(Google Colab)
以下實驗使用預訓練的 ViT 模型對影像進行分類,並提取自注意力權重生成注意力熱圖,直觀展示模型「看到了什麼」。
# ============================================================
# Lab 2: Vision Transformer — 影像分類 + 注意力熱圖視覺化
# 環境: Google Colab (GPU 或 CPU 皆可)
# ============================================================
# --- 0. 安裝 ---
!pip install -q transformers timm pillow matplotlib

import torch
import torch.nn.functional as F
import numpy as np
import matplotlib.pyplot as plt
from PIL import Image
from torchvision import transforms
from transformers import ViTForImageClassification, ViTFeatureExtractor
import requests
from io import BytesIO
import warnings
warnings.filterwarnings('ignore')

device = torch.device('cuda' if torch.cuda.is_available() else 'cpu')
print(f"Device: {device}")

# --- 1. 載入預訓練 ViT ---
model_name = "google/vit-base-patch16-224"
model = ViTForImageClassification.from_pretrained(
    model_name, output_attentions=True
).to(device).eval()
feature_extractor = ViTFeatureExtractor.from_pretrained(model_name)
print(f"Model: {model_name}")
print(f"Parameters: {sum(p.numel() for p in model.parameters()):,}")
print(f"Patch size: 16x16, Image size: 224x224 → 196 patches + 1 [CLS]")

# --- 2. 影像載入與預處理 ---
def load_image(url):
    response = requests.get(url)
    img = Image.open(BytesIO(response.content)).convert("RGB")
    return img

# 使用經典測試影像
urls = {
    "Golden Retriever": "https://upload.wikimedia.org/wikipedia/commons/thumb/b/bd/Golden_Retriever_Dukedestination.jpg/800px-Golden_Retriever_Dukedestination.jpg",
    "Tabby Cat": "https://upload.wikimedia.org/wikipedia/commons/thumb/4/4d/Cat_November_2010-1a.jpg/800px-Cat_November_2010-1a.jpg",
    "Bald Eagle": "https://upload.wikimedia.org/wikipedia/commons/thumb/1/1a/About_to_Launch_%2826075320352%29.jpg/800px-About_to_Launch_%2826075320352%29.jpg",
}

images = {}
for name, url in urls.items():
    try:
        images[name] = load_image(url)
        print(f"Loaded: {name} ({images[name].size})")
    except Exception as e:
        print(f"Failed to load {name}: {e}")

# --- 3. 推論 + 提取注意力 ---
def predict_with_attention(img, model, feature_extractor):
    inputs = feature_extractor(images=img, return_tensors="pt").to(device)
    with torch.no_grad():
        outputs = model(**inputs)

    logits = outputs.logits
    probs = F.softmax(logits, dim=-1)
    top5 = torch.topk(probs, 5)

    # 注意力權重: list of [B, heads, N, N] for each layer
    attentions = outputs.attentions  # 12 layers
    return top5, attentions

# --- 4. 注意力熱圖生成 ---
def get_attention_map(attentions, layer=-1):
    """提取指定層的 [CLS] token 注意力 → 14x14 熱圖"""
    # 取指定層,平均所有頭
    attn = attentions[layer][0]  # [heads, N, N]
    attn_avg = attn.mean(dim=0)  # [N, N]

    # [CLS] token (位置 0) 對所有 patch 的注意力
    cls_attn = attn_avg[0, 1:]  # 去掉 [CLS] 自身, [196]
    cls_attn = cls_attn.reshape(14, 14).cpu().numpy()

    # 歸一化
    cls_attn = (cls_attn - cls_attn.min()) / (cls_attn.max() - cls_attn.min() + 1e-8)
    return cls_attn

def get_rollout_attention(attentions):
    """Attention Rollout: 累積所有層的注意力"""
    result = torch.eye(attentions[0].size(-1)).to(device)
    for attn_layer in attentions:
        attn = attn_layer[0].mean(dim=0)  # [N, N] 平均所有頭
        attn = attn + torch.eye(attn.size(0)).to(device)  # 殘差連接
        attn = attn / attn.sum(dim=-1, keepdim=True)  # 正規化
        result = torch.matmul(attn, result)

    cls_attn = result[0, 1:].reshape(14, 14).cpu().numpy()
    cls_attn = (cls_attn - cls_attn.min()) / (cls_attn.max() - cls_attn.min() + 1e-8)
    return cls_attn

# --- 5. 視覺化 ---
def visualize_vit(name, img, model, feature_extractor):
    top5, attentions = predict_with_attention(img, model, feature_extractor)

    print(f"\n{'='*50}")
    print(f"Image: {name}")
    print(f"{'='*50}")
    for i in range(5):
        idx = top5.indices[0][i].item()
        prob = top5.values[0][i].item()
        label = model.config.id2label[idx]
        print(f"  {i+1}. {label}: {prob:.4f}")

    # 提取不同層的注意力
    attn_first = get_attention_map(attentions, layer=0)
    attn_mid = get_attention_map(attentions, layer=5)
    attn_last = get_attention_map(attentions, layer=-1)
    attn_rollout = get_rollout_attention(attentions)

    # 影像轉 numpy
    img_np = np.array(img.resize((224, 224)))

    fig, axes = plt.subplots(1, 5, figsize=(25, 5))

    axes[0].imshow(img_np)
    axes[0].set_title(f"Original\n{model.config.id2label[top5.indices[0][0].item()]}", fontsize=12)
    axes[0].axis('off')

    titles = ['Layer 1 Attention', 'Layer 6 Attention',
              'Layer 12 Attention', 'Attention Rollout']
    maps = [attn_first, attn_mid, attn_last, attn_rollout]

    for i, (title, attn_map) in enumerate(zip(titles, maps)):
        ax = axes[i + 1]
        ax.imshow(img_np)
        attn_resized = np.array(Image.fromarray(
            (attn_map * 255).astype(np.uint8)
        ).resize((224, 224), Image.BICUBIC)) / 255.0
        ax.imshow(attn_resized, alpha=0.6, cmap='jet')
        ax.set_title(title, fontsize=12)
        ax.axis('off')

    plt.suptitle(f'ViT Attention Maps — {name}', fontsize=16, fontweight='bold')
    plt.tight_layout()
    plt.show()

# --- 6. 執行視覺化 ---
for name, img in images.items():
    visualize_vit(name, img, model, feature_extractor)

# --- 7. 多頭注意力比較 ---
def visualize_heads(name, img, model, feature_extractor, layer=-1):
    """視覺化指定層中不同頭的注意力模式"""
    inputs = feature_extractor(images=img, return_tensors="pt").to(device)
    with torch.no_grad():
        outputs = model(**inputs, output_attentions=True)

    attn = outputs.attentions[layer][0]  # [12, 197, 197]
    img_np = np.array(img.resize((224, 224)))

    fig, axes = plt.subplots(2, 6, figsize=(24, 8))
    for head_idx in range(12):
        ax = axes[head_idx // 6][head_idx % 6]
        head_attn = attn[head_idx, 0, 1:].reshape(14, 14).cpu().numpy()
        head_attn = (head_attn - head_attn.min()) / (head_attn.max() - head_attn.min() + 1e-8)
        attn_resized = np.array(Image.fromarray(
            (head_attn * 255).astype(np.uint8)
        ).resize((224, 224), Image.BICUBIC)) / 255.0

        ax.imshow(img_np)
        ax.imshow(attn_resized, alpha=0.6, cmap='inferno')
        ax.set_title(f'Head {head_idx+1}', fontsize=10)
        ax.axis('off')

    plt.suptitle(f'12 Attention Heads (Last Layer) — {name}', fontsize=16, fontweight='bold')
    plt.tight_layout()
    plt.show()

# 視覺化第一張影像的 12 個頭
first_name = list(images.keys())[0]
visualize_heads(first_name, images[first_name], model, feature_extractor)

print("\nLab 2 Complete!")
十一、決策框架:企業如何選擇注意力架構
| 場景 | 推薦架構 | 理由 |
|---|---|---|
| 文本分類 / NER | BERT-base 微調 | 雙向上下文,分類任務最優 |
| 文字生成 / 對話 | GPT 系列 / LLaMA | 自迴歸生成,因果注意力 |
| 影像分類 | ViT / Swin Transformer | 大規模資料上超越 CNN |
| 物件偵測 | DETR / Swin + FPN | 端到端,無需 anchor box |
| 超長序列 | FlashAttention + RoPE | 128K+ token 上下文 |
| 邊緣裝置 | 蒸餾 ViT / MobileViT | 輕量化自注意力 |
| 多模態 | 交叉注意力 Transformer | 統一影像-文字表示 |
十二、結語與展望
自注意力機制是過去十年人工智慧最重要的突破之一。從 2017 年的「Attention Is All You Need」[1]到今天的 GPT-4、Claude、Gemini,自注意力已成為幾乎所有前沿 AI 系統的計算核心。
回顧這場革命:
- NLP 的統一:從 BERT[3] 到 GPT[5],Transformer 統一了理解與生成
- 視覺的突破:ViT[6] 證明自注意力不僅適用於序列,也能處理二維結構
- 效率的飛躍:FlashAttention[11] 和稀疏注意力讓百萬 token 上下文成為現實
- 規模的魔法:Scaling Laws[15] 和湧現能力[16]揭示了「更大 = 質變」的規律
展望未來,自注意力的演化方向包括:狀態空間模型(SSM / Mamba)作為次線性複雜度的替代方案、混合專家(MoE)實現稀疏激活的超大模型、以及多模態統一架構將文字、影像、音訊、影片融合在同一個注意力空間中。無論具體形式如何演變,「讓每個元素都能動態關注所有相關資訊」這一核心思想,將持續引領 AI 的下一個十年。